TL;DR - if you are not interested in an in-depth overview of the research done, scroll down to Part 2 – implementation section for a mod announcement and the download link.
MAY 2, 2020 UPDATE:
Build 2 has been released! This release fixes numerous reported issues, including DoF issues and an accidental incompatibility with Windows 7.
For a full changelog, see the Release page on GitHub.
Introduction
Deus Ex: Human Revolution is a third installment in the Deus Ex series, released in 2011. The game was initially released on PC, Xbox 360, and PlayStation 3. In 2013, a Director’s Cut version was released – initially a Wii U exclusive, it eventually was ported back to the original platforms, including PC.
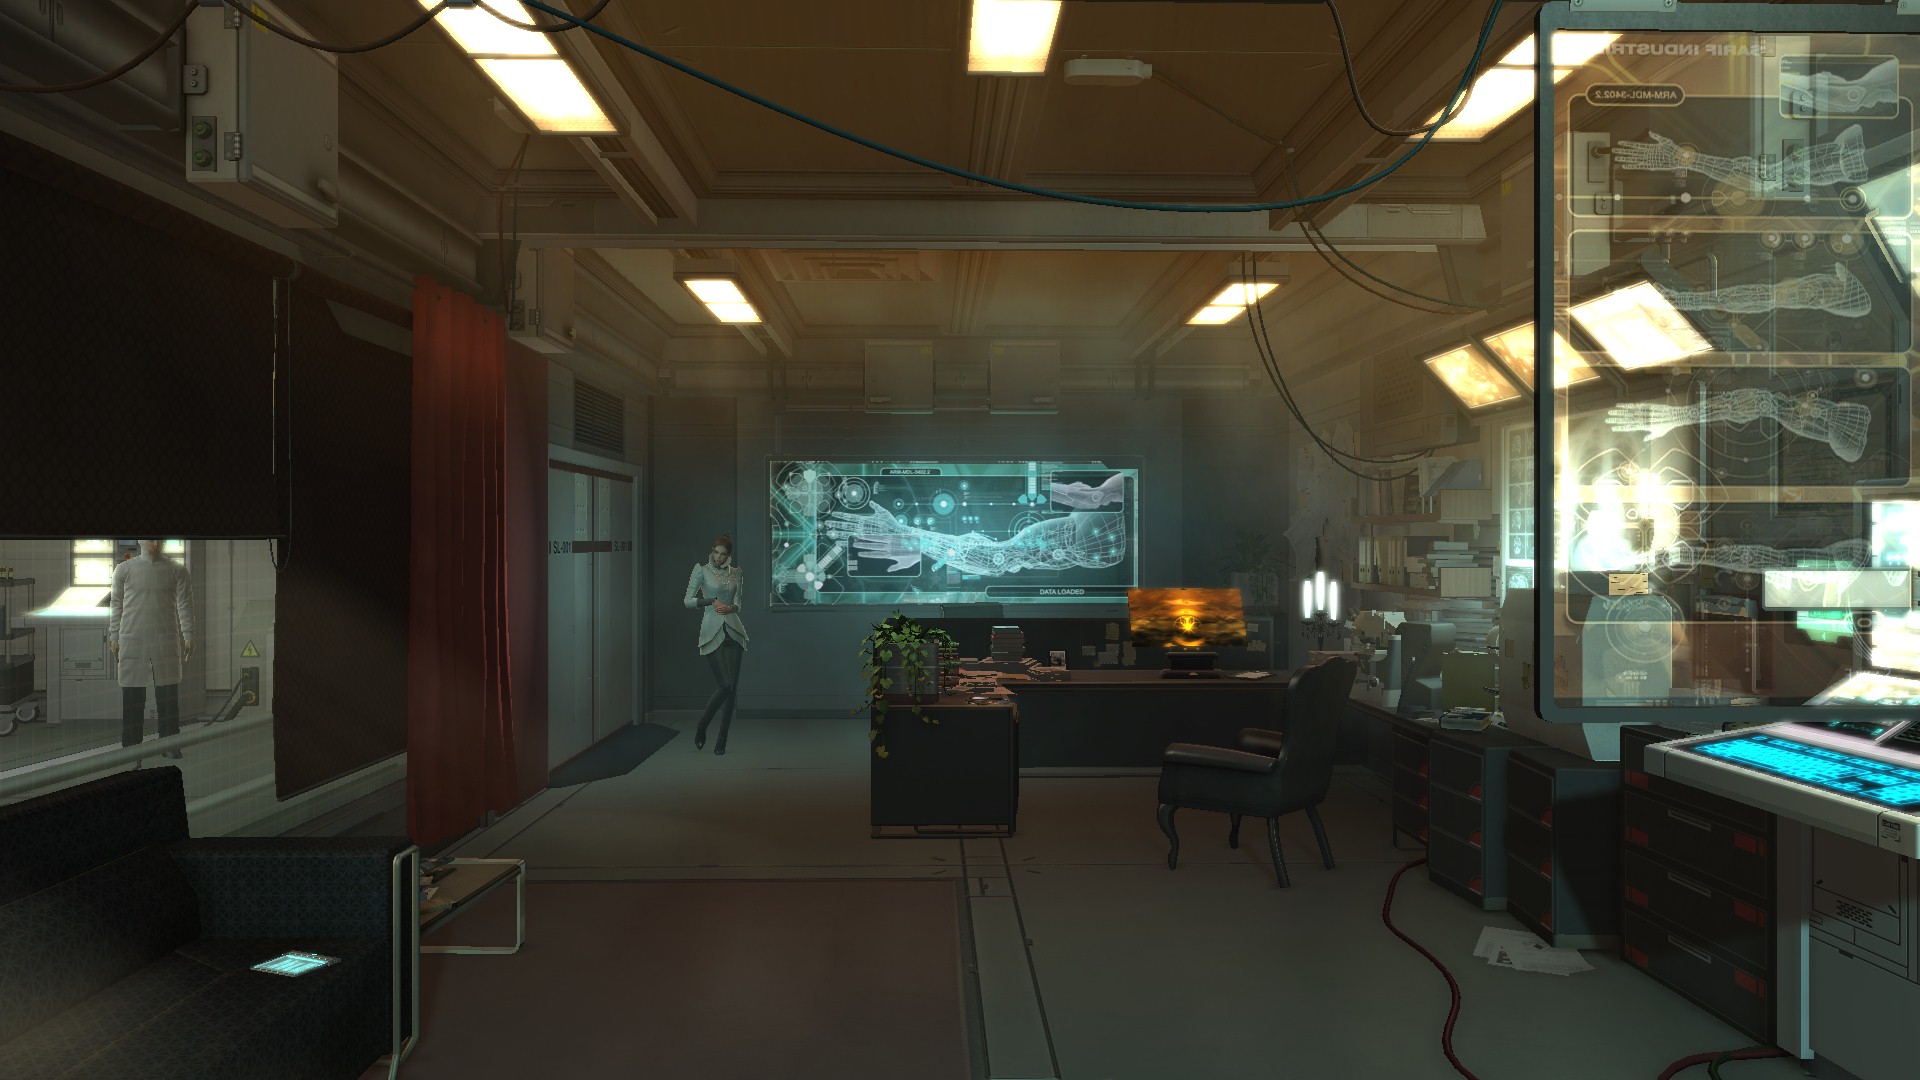
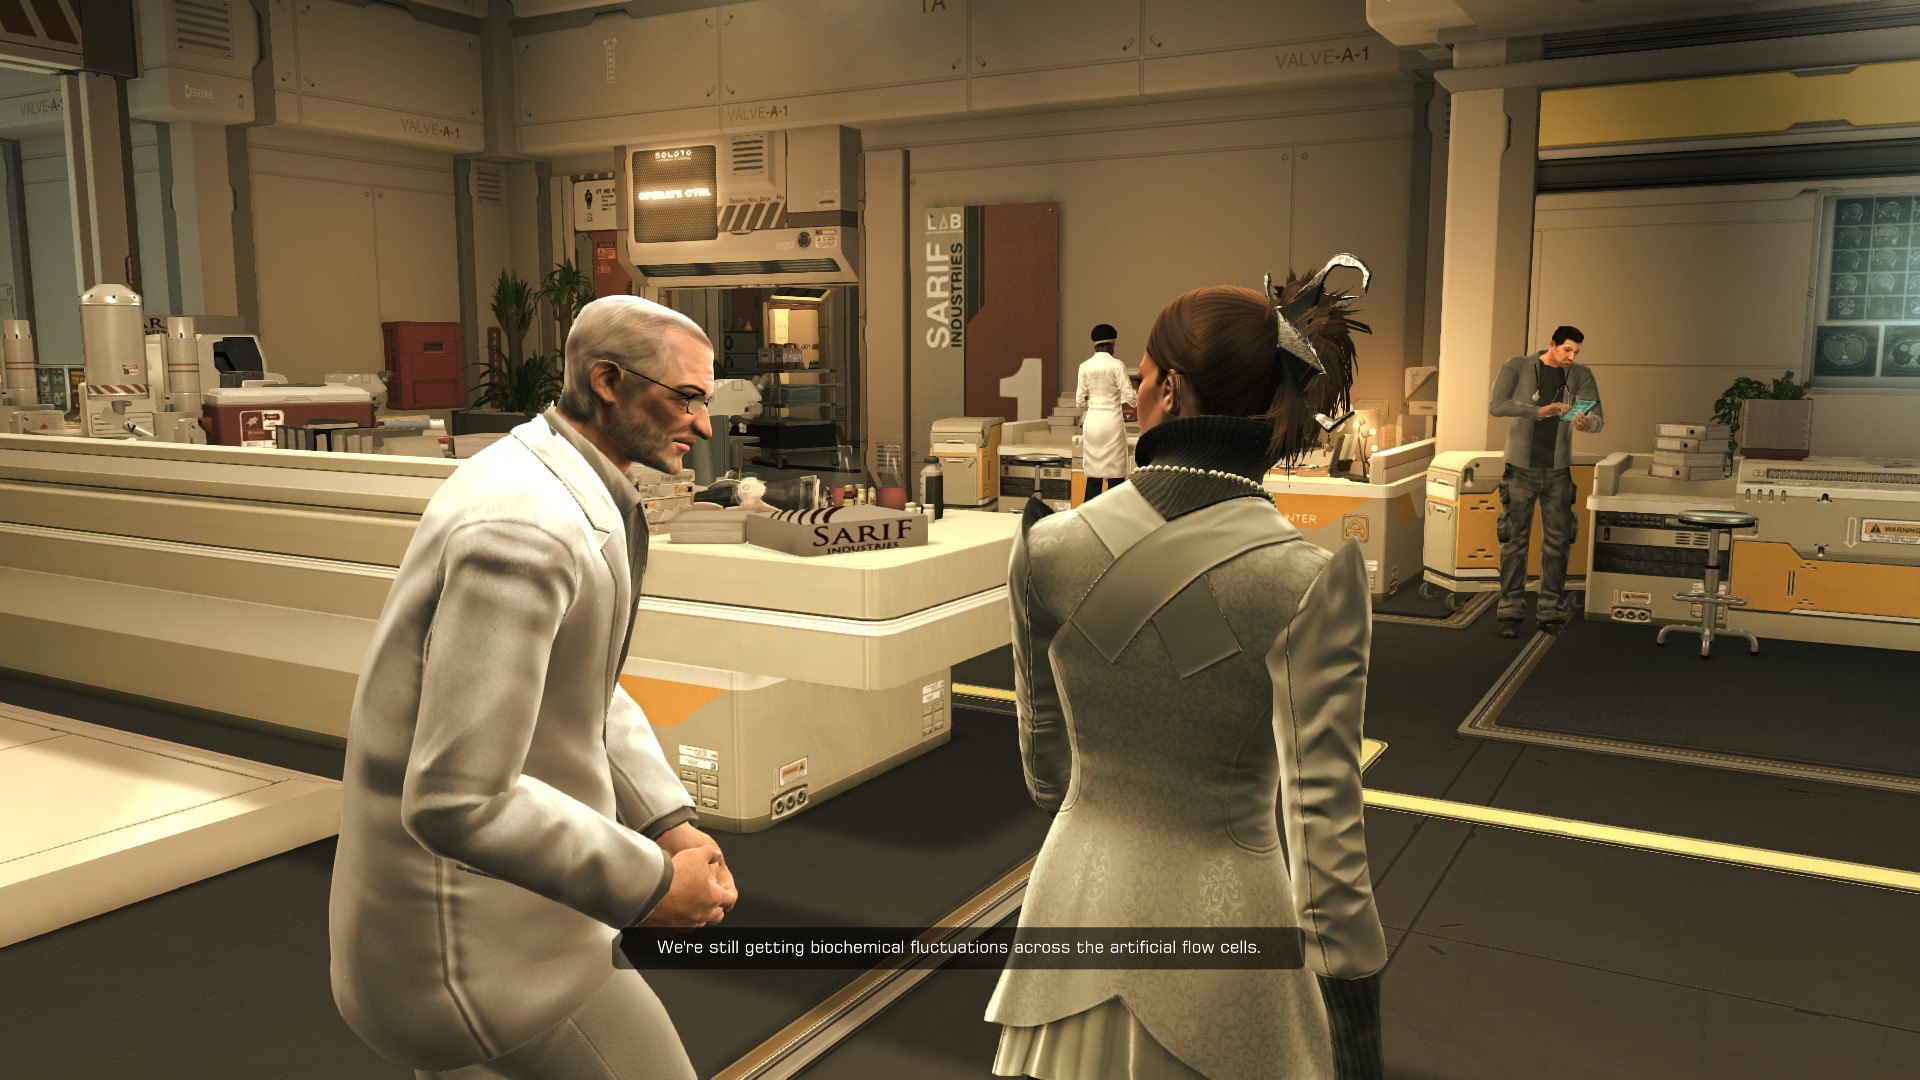
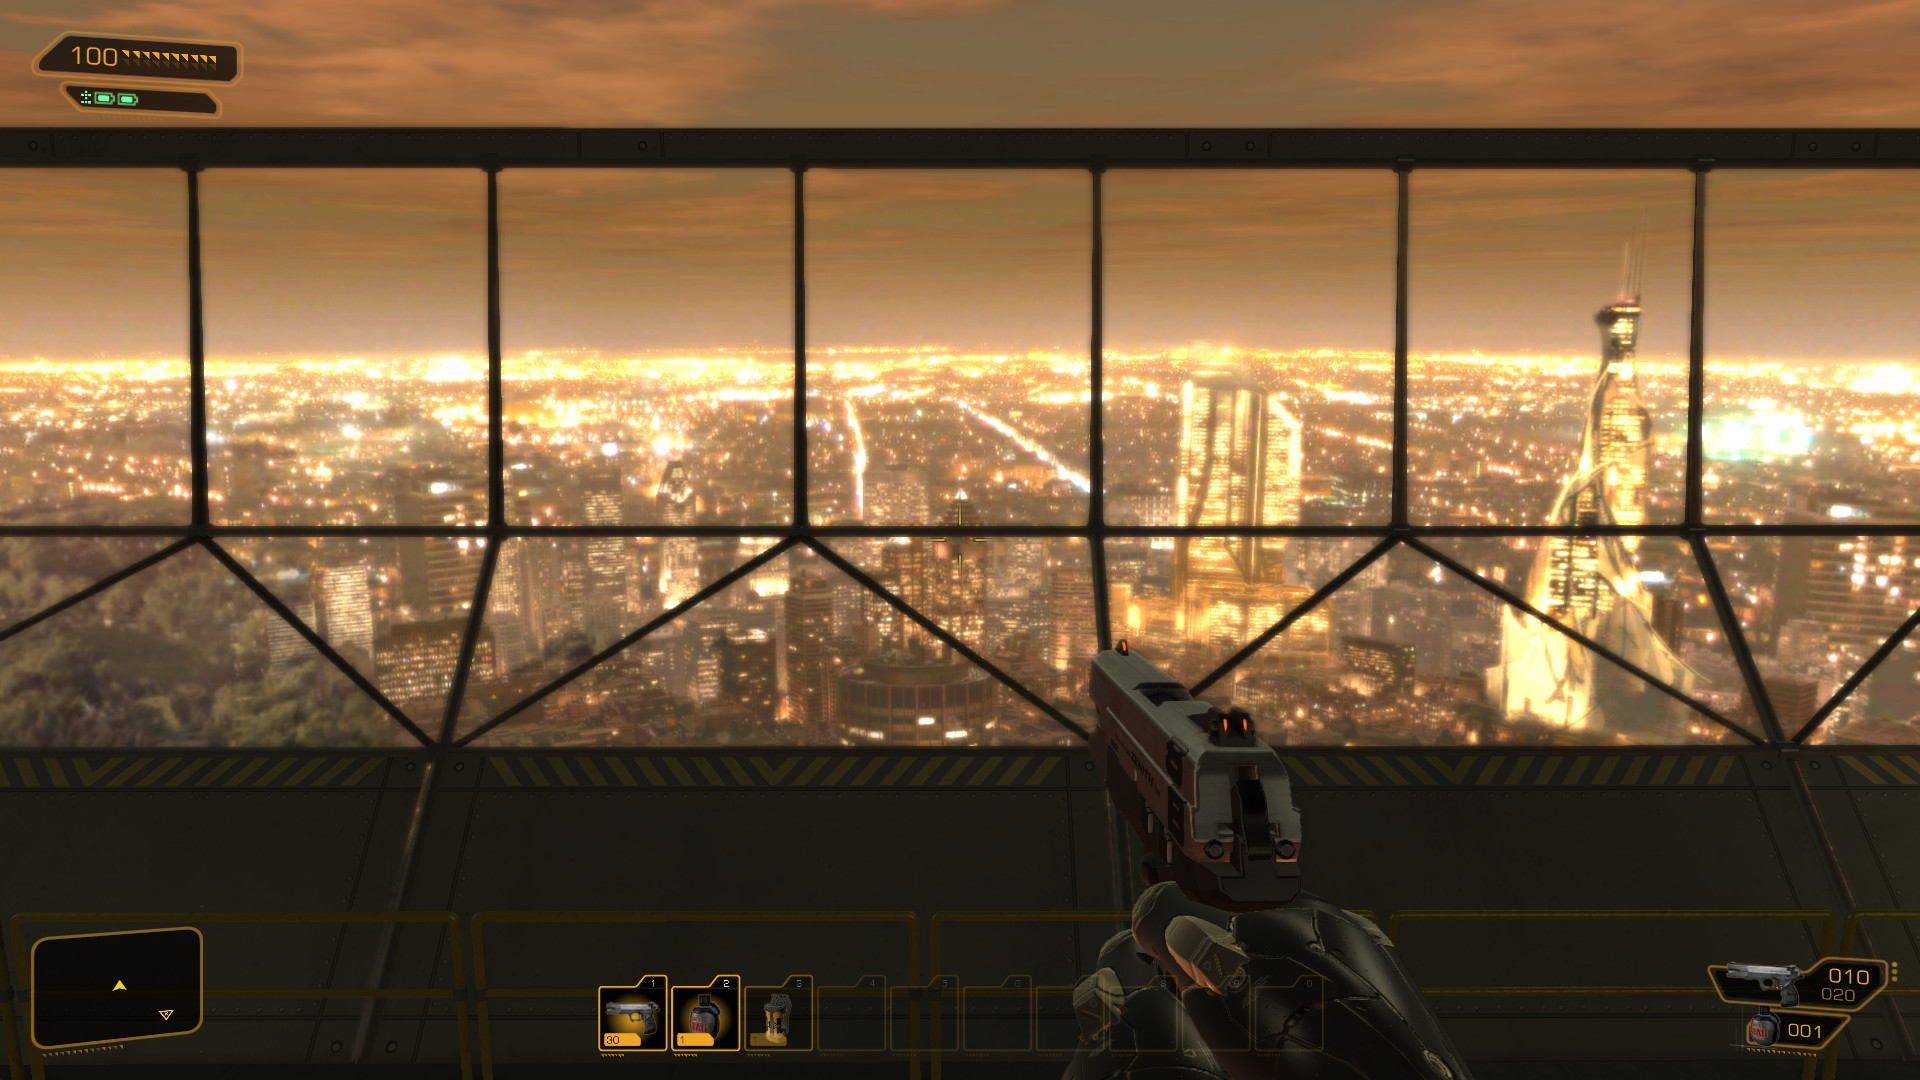
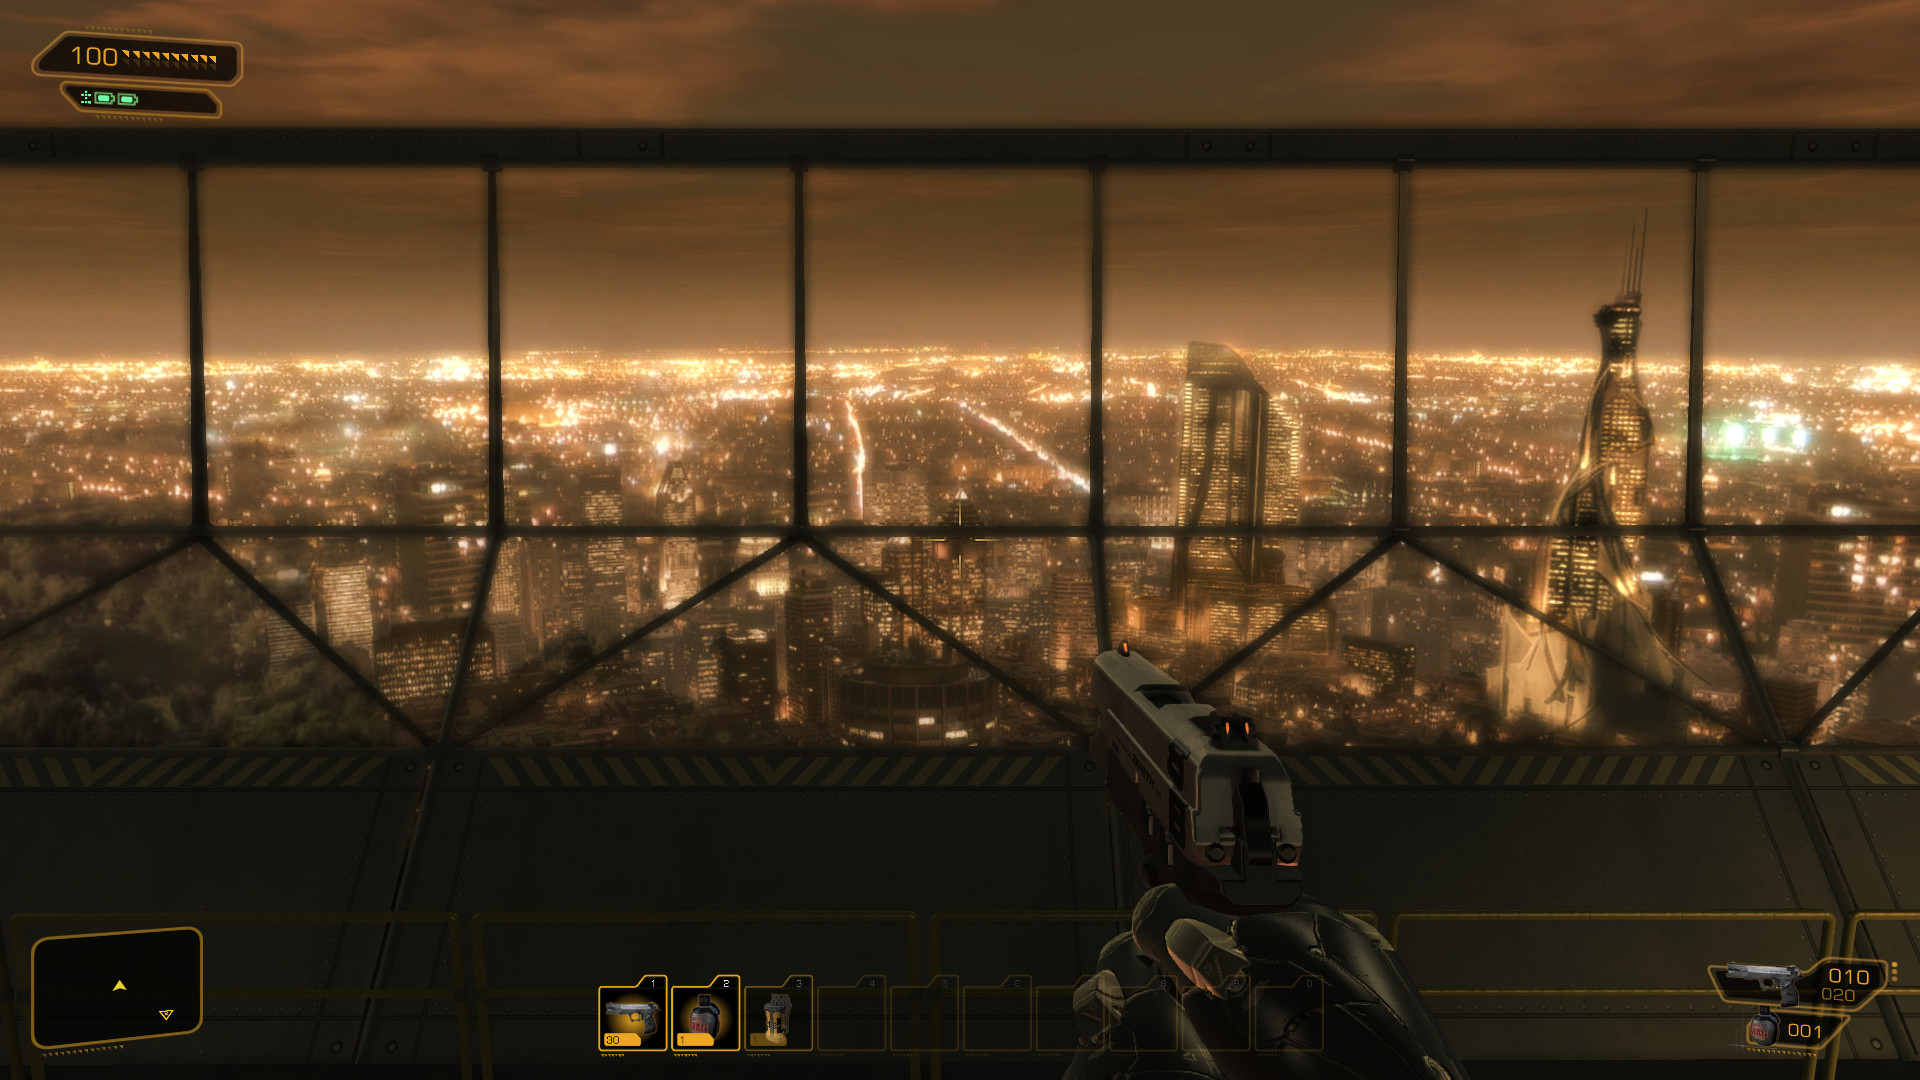
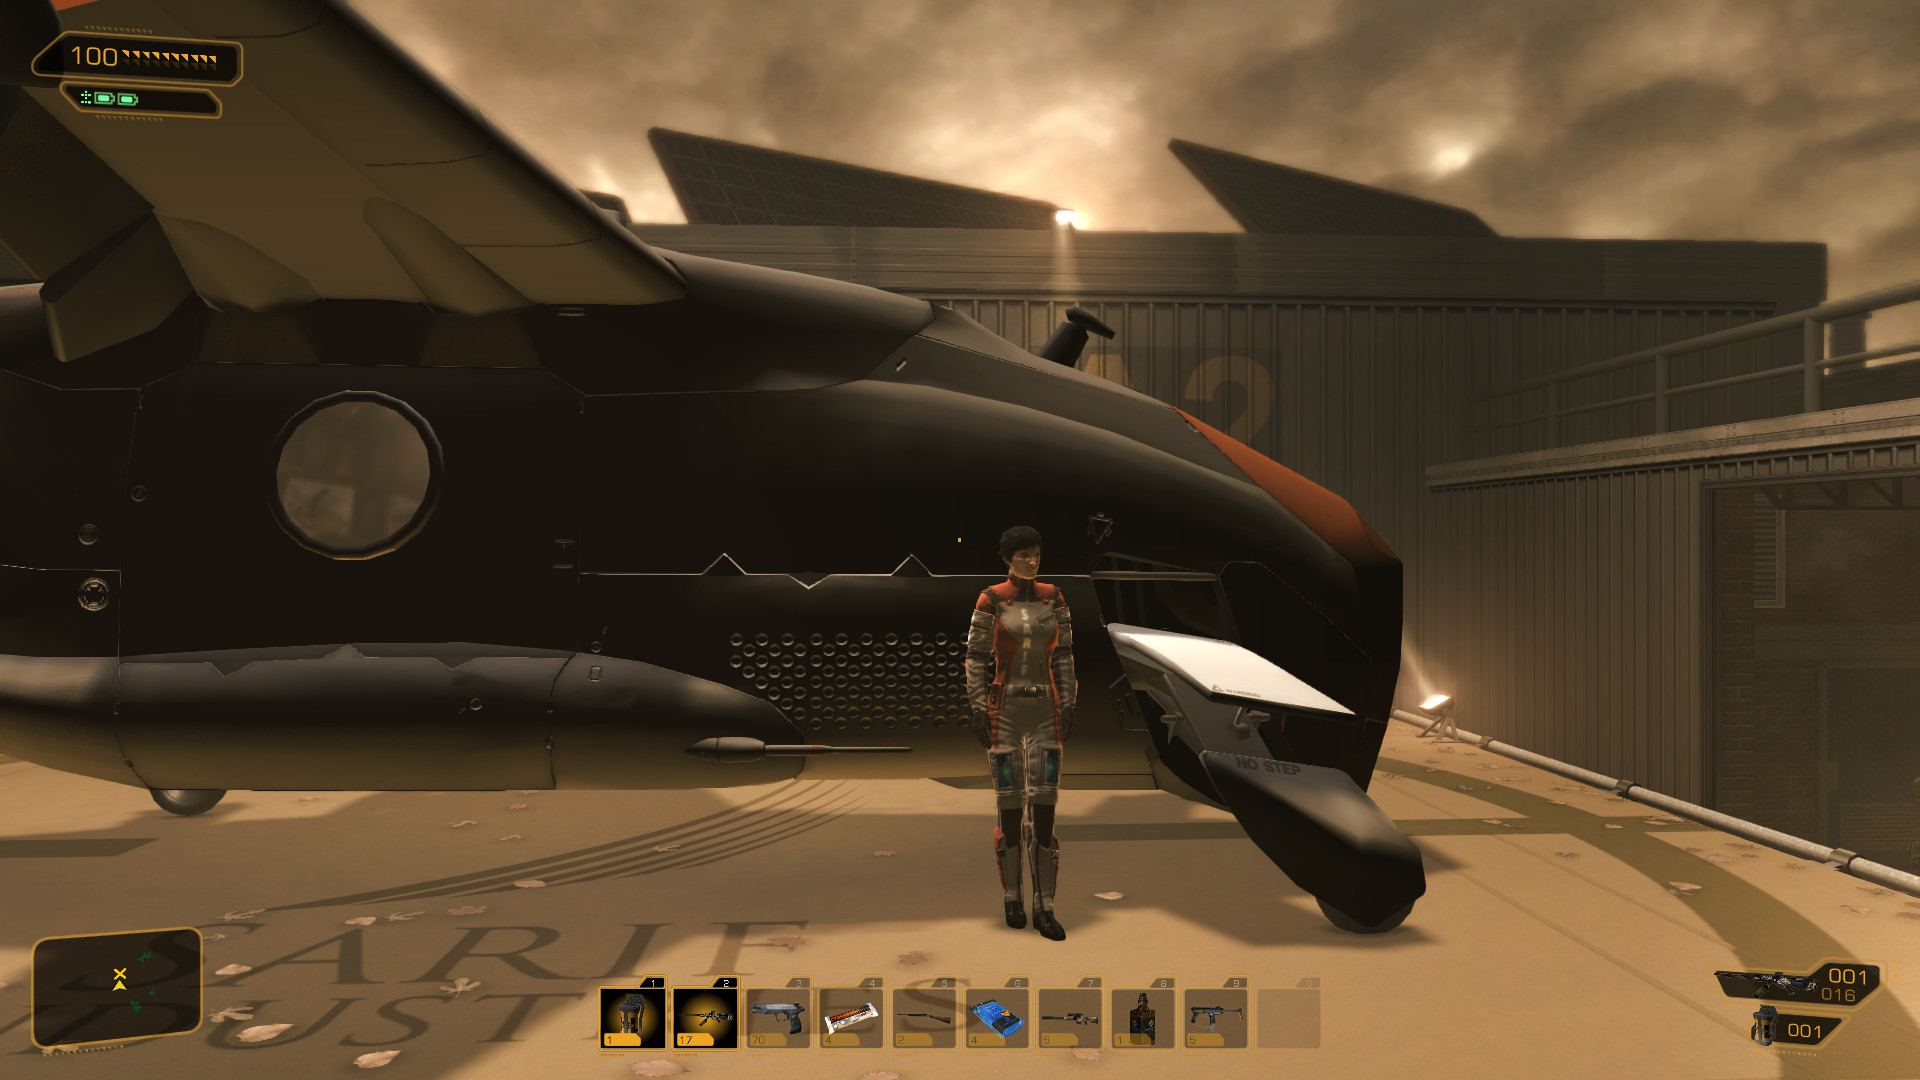
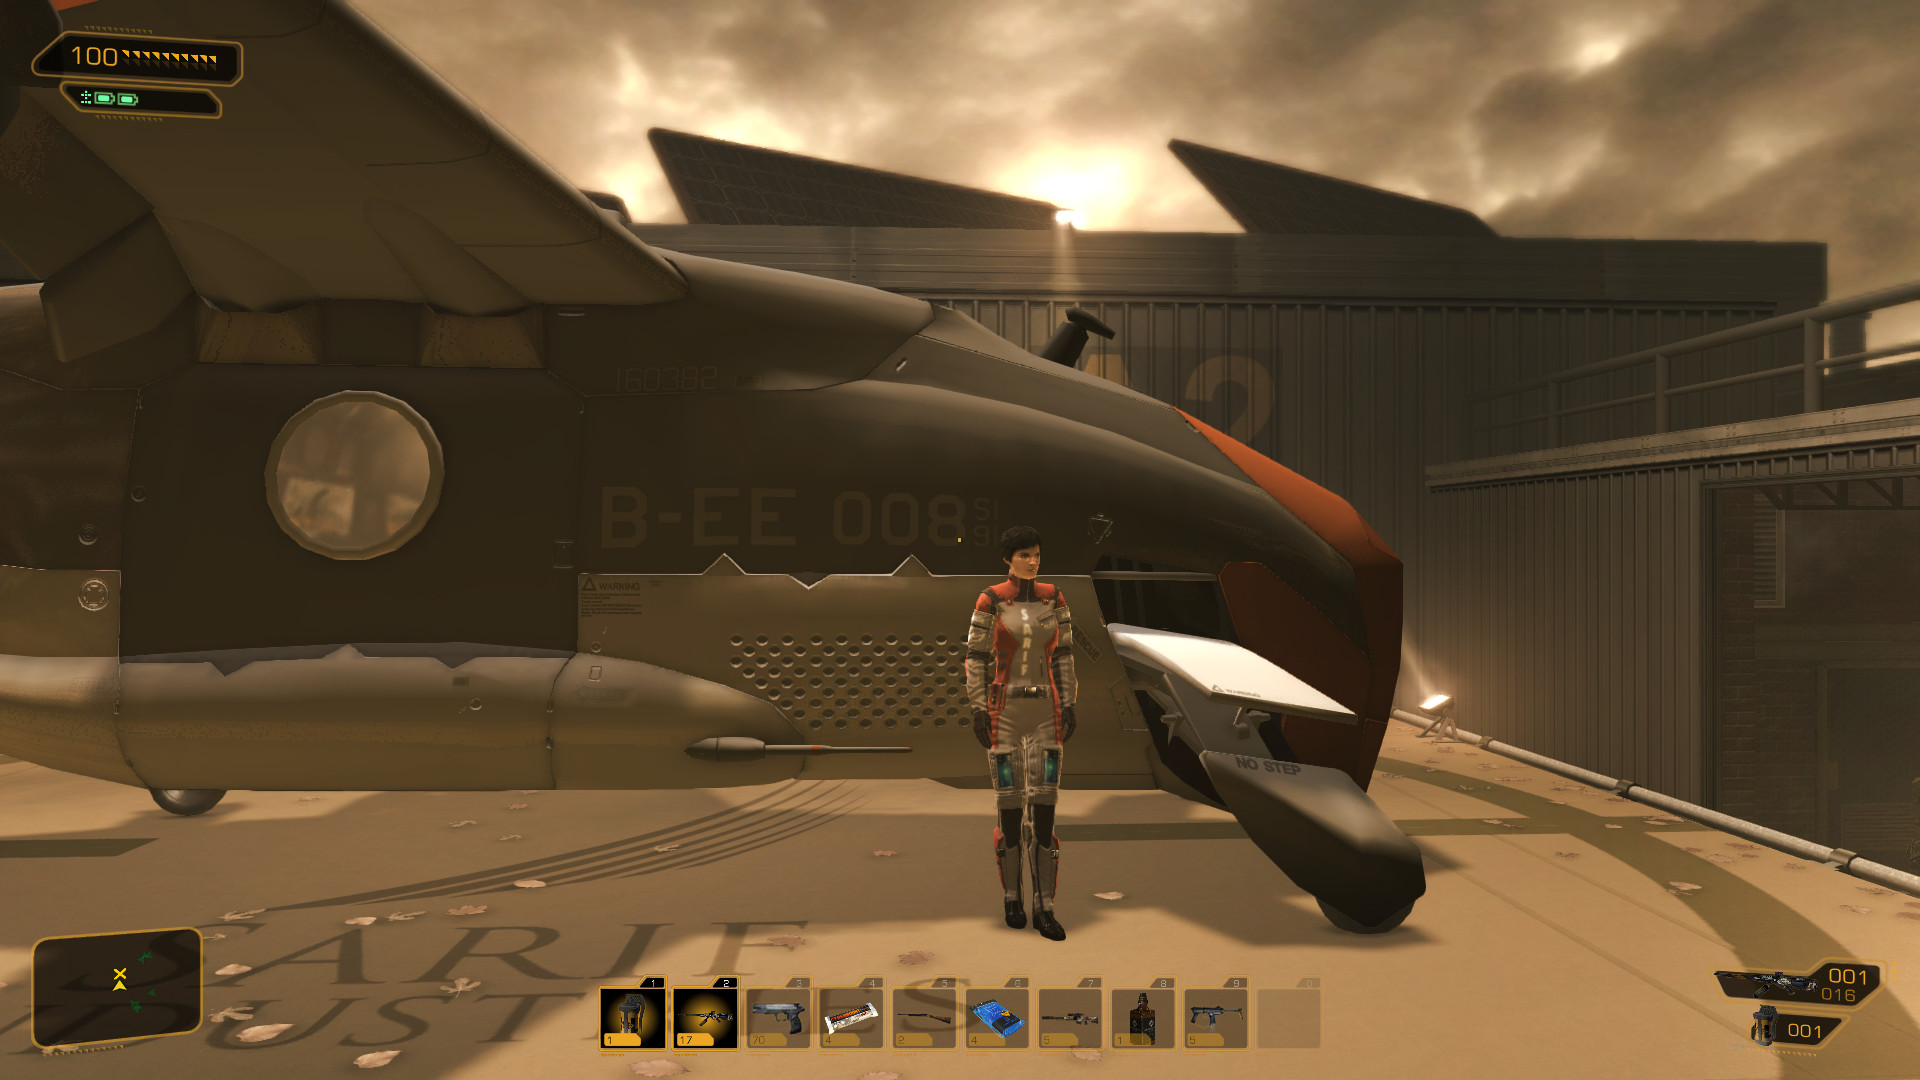
Those who played either the original game or Director’s Cut may remember well one of its iconic visual features, which was also the most controversial – the “gold filter”. This trademark post-processing effect shaded everything in the game to the game’s key colors – gold and black.
I said this visual feature is “controversial” because it divided people a lot – some loved it, others hated it. Sadly, this effect is not toggleable via options and can’t be easily disabled by modifying the configuration files, so people who could not stand this filter were either forced to accept it or dropped the game. Of course, mods were created to remove the effect, but I don’t know if they remove this post-processing effect or just gamma correct the final image to “undo” the changes the best they can.
With the release of the Director’s Cut, the game has received numerous changes to gameplay and visuals. Post-processing effects and shading have been altered, and much to everyone’s surprise, the gold filter was gone!

Looking at the comparison, it’s obvious that the gold filter is not the only change. It’s up to the reader to decide whether the changes are for better or worse, but we can objectively say that the game looks different – and there is no going back.
However, with all changes documented and understood, it will definitely be possible to mod DXHR Director’s Cut to match the original game’s visuals. Let’s get to it!
Part 1 – research
First of all, I only intend to focus on rendering differences between those two games. For a detailed writeup on DXHR’s graphics, check out Deus Ex: Human Revolution – Graphics Study from Adrian Courrèges. During my research, I referenced this article heavily when looking through the captures.
I started my analysis by taking a C++ capture from both DXHR and DXHR Director’s Cut with NVIDIA Nsight Graphics. This works far better than using RenderDoc alone, since the end product of such capture is C++ code, and therefore it is trivially editable. This allowed me to prototype and tinker with the game’s visuals much more efficiently than when I was editing RenderDoc captures for my previous projects.
With both scenes ready for the analysis, I started by taking a close look at the post-processing.
Before diving into the details of each effect, it is worth to remember the order in which post-processing is performed in this game:
- Bloom
- Anti-aliasing (if enabled)
- Color filter
- Depth of Field (only in some scenes)
Color filter
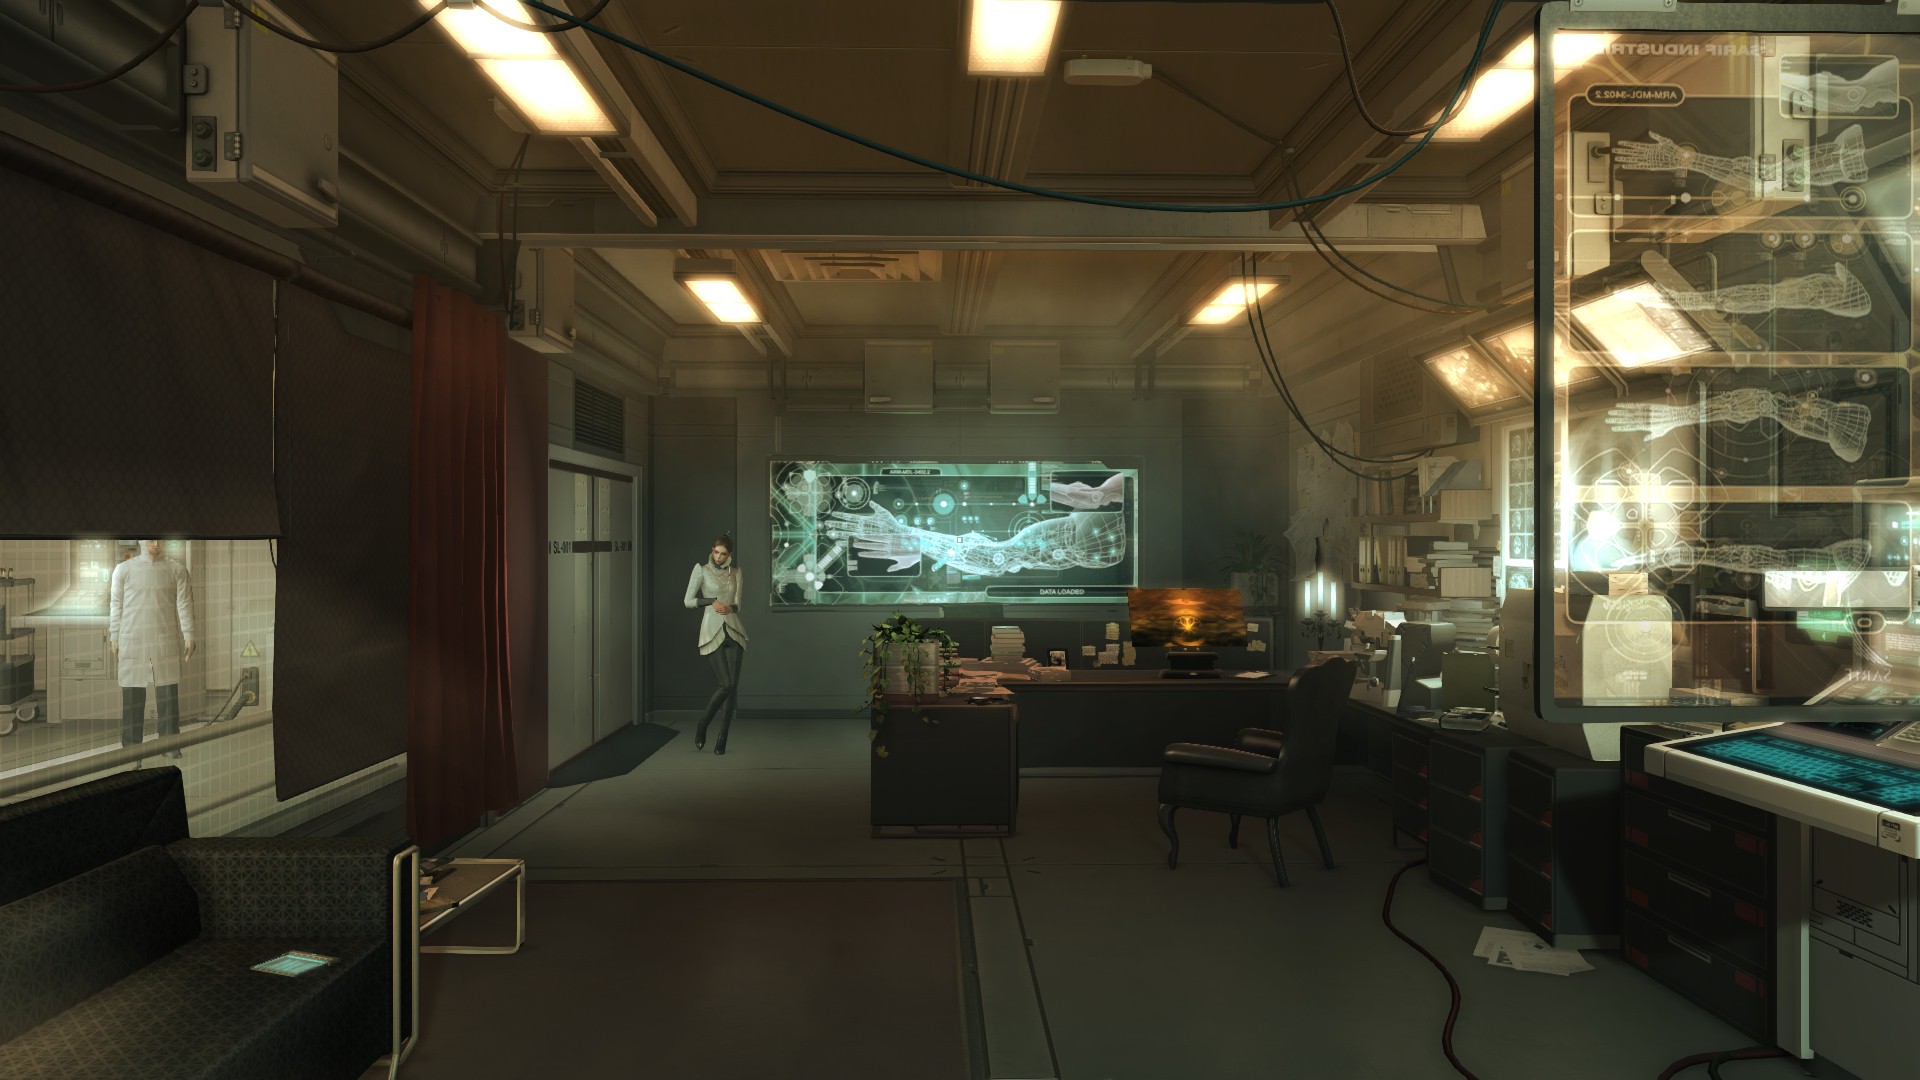
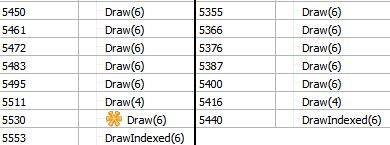
As mentioned earlier, the first and most obvious difference between the games is the absence of the “gold filter”. While it wasn’t known if DXHR Director’s Cut only altered this post-processing effect or outright removed it, a glance at RenderDoc captures makes it obvious that it is (sadly) removed for good – notice the absence of a 6-primitive draw in the Director’s Cut (marked with a yellow icon in DXHR):
The filter itself does not seem to be complicated, though. Since the game uses D3D111, I have no access to the shaders as is, and have to settle on looking through the DXBC bytecode. In principle, it is just a color grading pixel shader with one input and one output, and thus it has no additional information about the scene other than the final image. Other than that, aside from the standard set of constant buffers shared between most draws in the game, color grading uses a unique constant buffer with what seems to be color attributes. For example, the very first room in the game has those attributes:
InstanceParams[0] 0.85, 0.75, 1.25, 0.00
InstanceParams[1] 0.25098, 0.31373, 0.28235, 1.00
InstanceParams[2] 0.60392, 0.52627, 0.4098, 1.10
InstanceParams[3] 0.52941, 0.52941, 0.52941, 1.00
InstanceParams[4] 1.00, 0.00, 0.70, 0.70
This raises two questions:
- What are those attributes?
- Do they change? If so, how?
Question 1. is not relevant for the time being, because, for the sake of a quick re-implementation in the Director’s Cut, I can just copy those values over
without having to document them fully – either way, I’ll answer this later.
Question 2. is relevant for the correctness of a re-implementation, and in this case, D3D11 actually works in my favour.
While D3D9 had no notion of a constant buffer per se, in D3D11 there are distinct buffer objects and they can be marked as mutable/immutable.
With immutable buffers, it is guaranteed they don’t change. InstanceParams buffer is mutable, however:
ByteWidth           128
Usage               D3D11_USAGE_DYNAMIC
BindFlags           D3D11_BIND_CONSTANT_BUFFER
CPUAccessFlags      D3D11_CPU_ACCESS_WRITE
MiscFlags           0
StructureByteStride 0
To find out more, in the meantime I contacted Adrian Courrèges himself and shared my findings. Thankfully, Adrian still had a handful of captures from the original DXHR (I’ve only ever played Director’s Cut, so getting to any other locations in the original game would’ve taken plenty of time) and was able to extract the constant buffer contents from them. Unsurprisingly, every capture had them different, so I placed them in a serialized capture mentioned earlier so I could easily visualize how they would look on the same test scene:

As you can see, the colors are quite different, which means those attributes are relevant for the final presentation. Sadly, I tried to look for any remains of those attributes in the Director’s Cut and currently did not manage to find anything. While it would be nice to see them working again, for my re-implementation I settled on picking one constant set of colors for the entire game – it doesn’t match the original Human Revolution 1:1, but it looks very close in the majority of scenarios as is.
Either way, now I know everything I needed about this effect, so I can move to the next difference.
Bloom
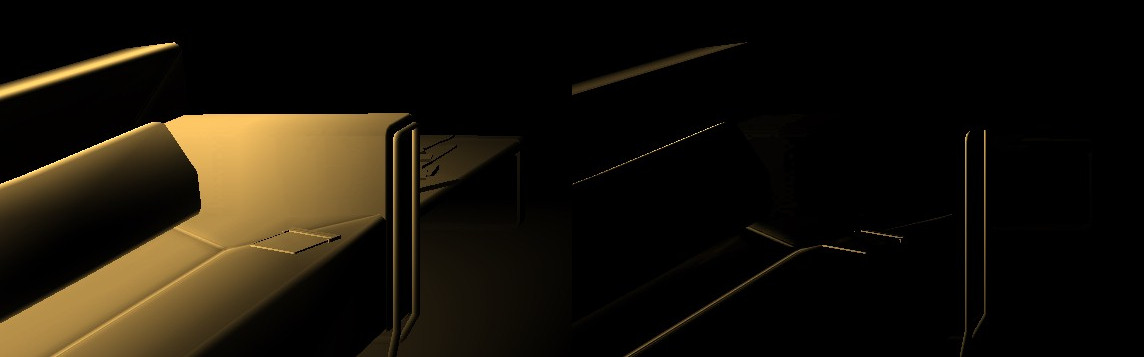
When taking a closer look at the comparison between the games, one might notice that bloom looks very different. Indeed, it is most noticeable when looking at light sources. Even though it might look like it, that difference is not caused by the color filter – it’s bloom which also has been modified. To make this clear, let’s compare both scenes right after the bloom pass before AA or color grading is applied:
Looking at the keypad on the right side of the scene and ceiling lights, we can observe that in the original Human Revolution bloom seems to be more spread/blurred, but fainter. From what I can see, the Director’s Cut bloom is more “concentrated”.
If we look at only the bloom, before it’s blended back to the scene, this becomes even more noticeable – in Director’s Cut, bloom is sharper and stronger:
In both games, bloom is realized with 5 draw calls – 4 draw calls on bloom + 1 call merging the result back to the main scene. Curiously, differences don’t only boil down to different shaders, so it’s worth comparing each draw separately. One of the draw calls is identical in both games, and I marked it with bold.
Human Revolution:
- Extract light elements from the image (shader A).
- Redraw using shader B.
- Redraw using shader C.
- Redraw using shader D.
- Merge bloom back using shader E and intensity 1.5.
Director’s Cut:
- Extract light elements from the image (shader A’).
- Redraw using shader B.
- Redraw using shader B (again).
- Redraw using shader D’.
- Merge bloom back using shader E’ and intensity 2.0.
Thankfully, all the constant buffers involved in the bloom pass are immutable – and thus I have a guarantee that they don’t change during the gameplay. This should make bloom fairly straightforward to restore later, much more straightforward than the gold filter.
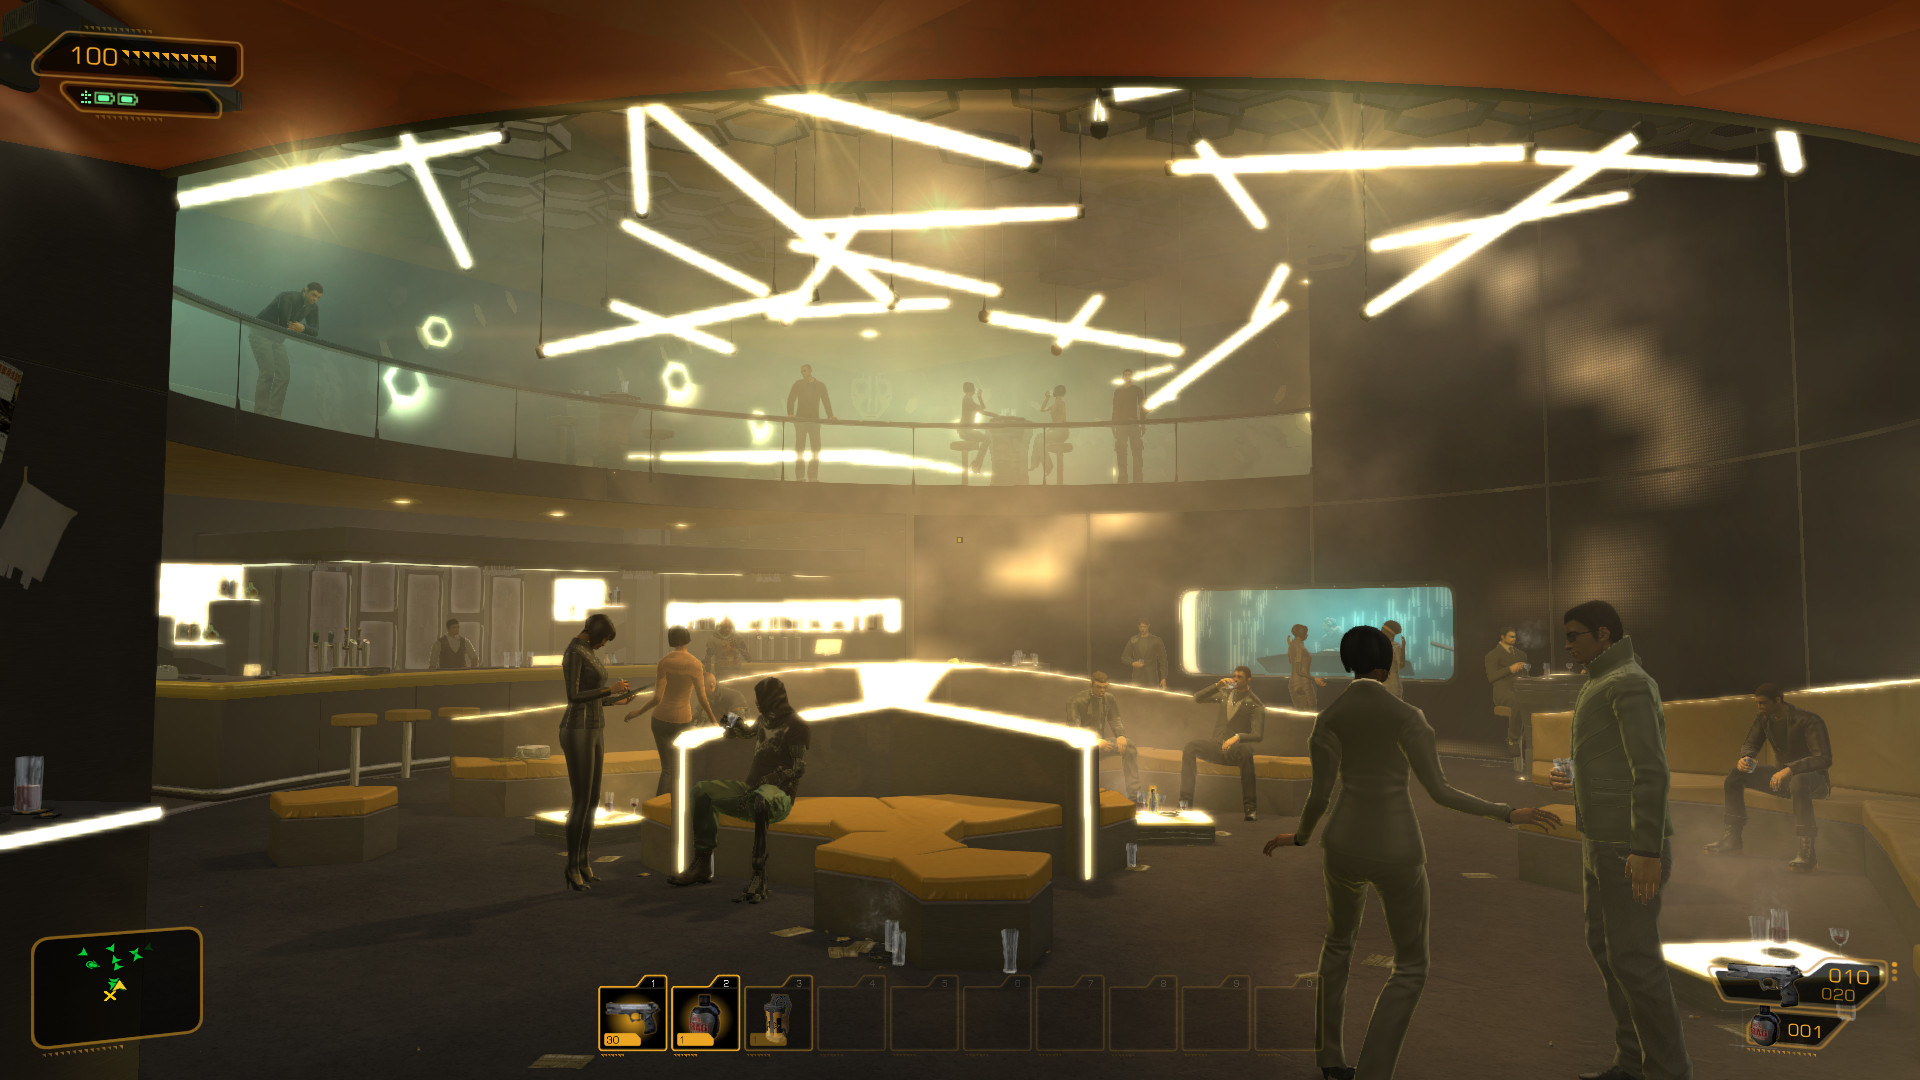
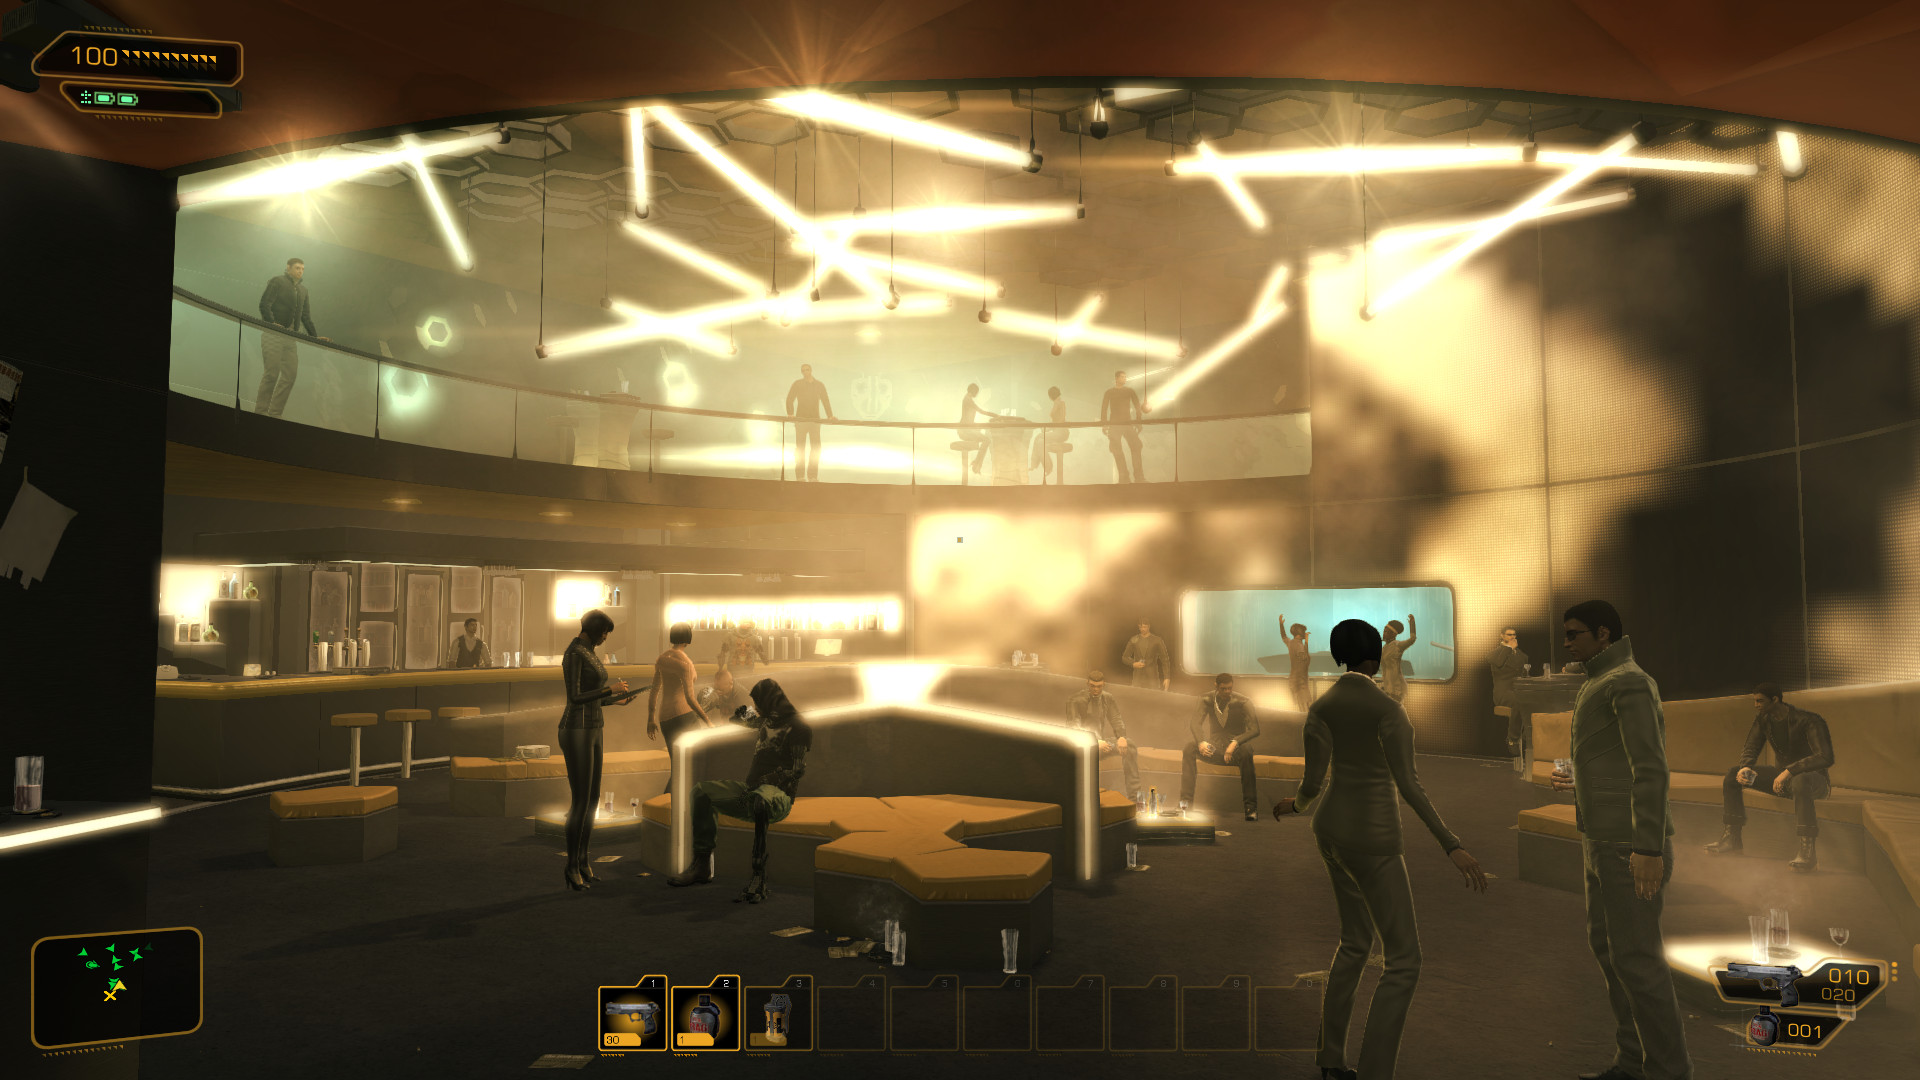
Lighting – improved, glitched, or both?
The last major difference I spotted was lighting. For this let’s again start with the same scene, but this time compare only the lightmaps – that is, a render target which contains only the information about the lighting.

It’s pretty different, isn’t it? Most of the lights seem to be darker in Director’s Cut, but some light also seems to be missing.
Darker lights seem to be less exciting than one would think – it indeed seems to be a change in the shader, perhaps to counter for lack of the color filter. In my opinion, this change is not very interesting. On the comparison below, you can see that while the light is darker, that’s about the only difference.
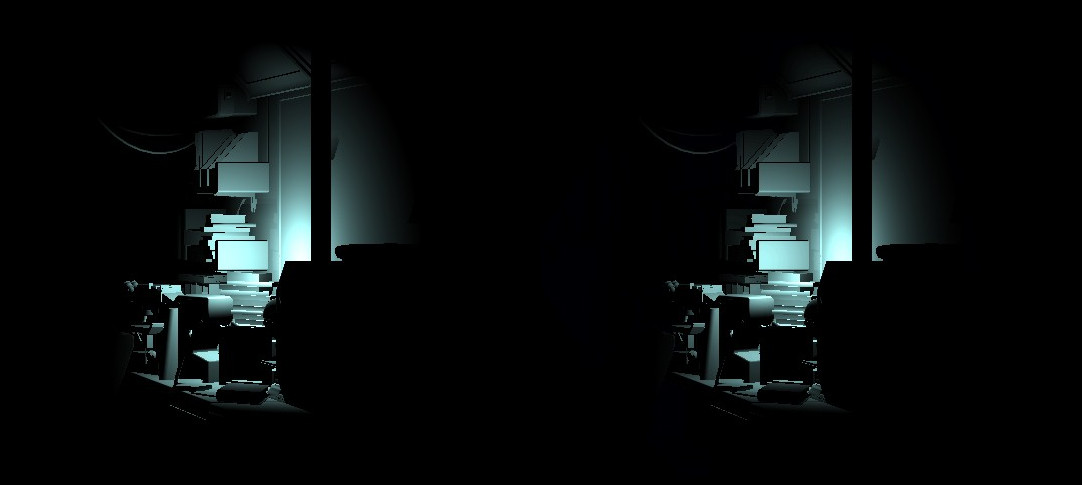
The other part of the lighting differences is far more interesting, however. If you look at the comparison again, you can see that almost every brown source of light is missing. This is most noticeable on the right side of the screen, and at the couch in the bottom left.
If we isolate only the light cast on the couch, we can see the problem in greater detail.
This light seems broken! While it is not unreasonable to think that darker lights are a legitimate design choice, this change seems to be a bug – no light should work this way! I can’t explain what is going on here from the technical side, but I assume the shader got converted incorrectly from the source platform (possibly Wii U).
Thankfully, once again this change boils down to a modified pixel shader. Replacing the Director’s Cut with DXHR’s original shader works fine! (more on that later)
It’s worth noting that this is not the only affected room in the game. From what I can see, missing lights are virtually everywhere – for example, compare the lighting on the doors in this scene in DXHR and Director’s Cut:
This is a simple fix, but the game’s atmosphere should benefit greatly – even if not using any other DXHR effects.
Other differences?
The differences listed above are all the major changes I was able to identify and understand. Sadly, there were also a few changes I could not explain and I feel like I could not undo them safely and effectively.
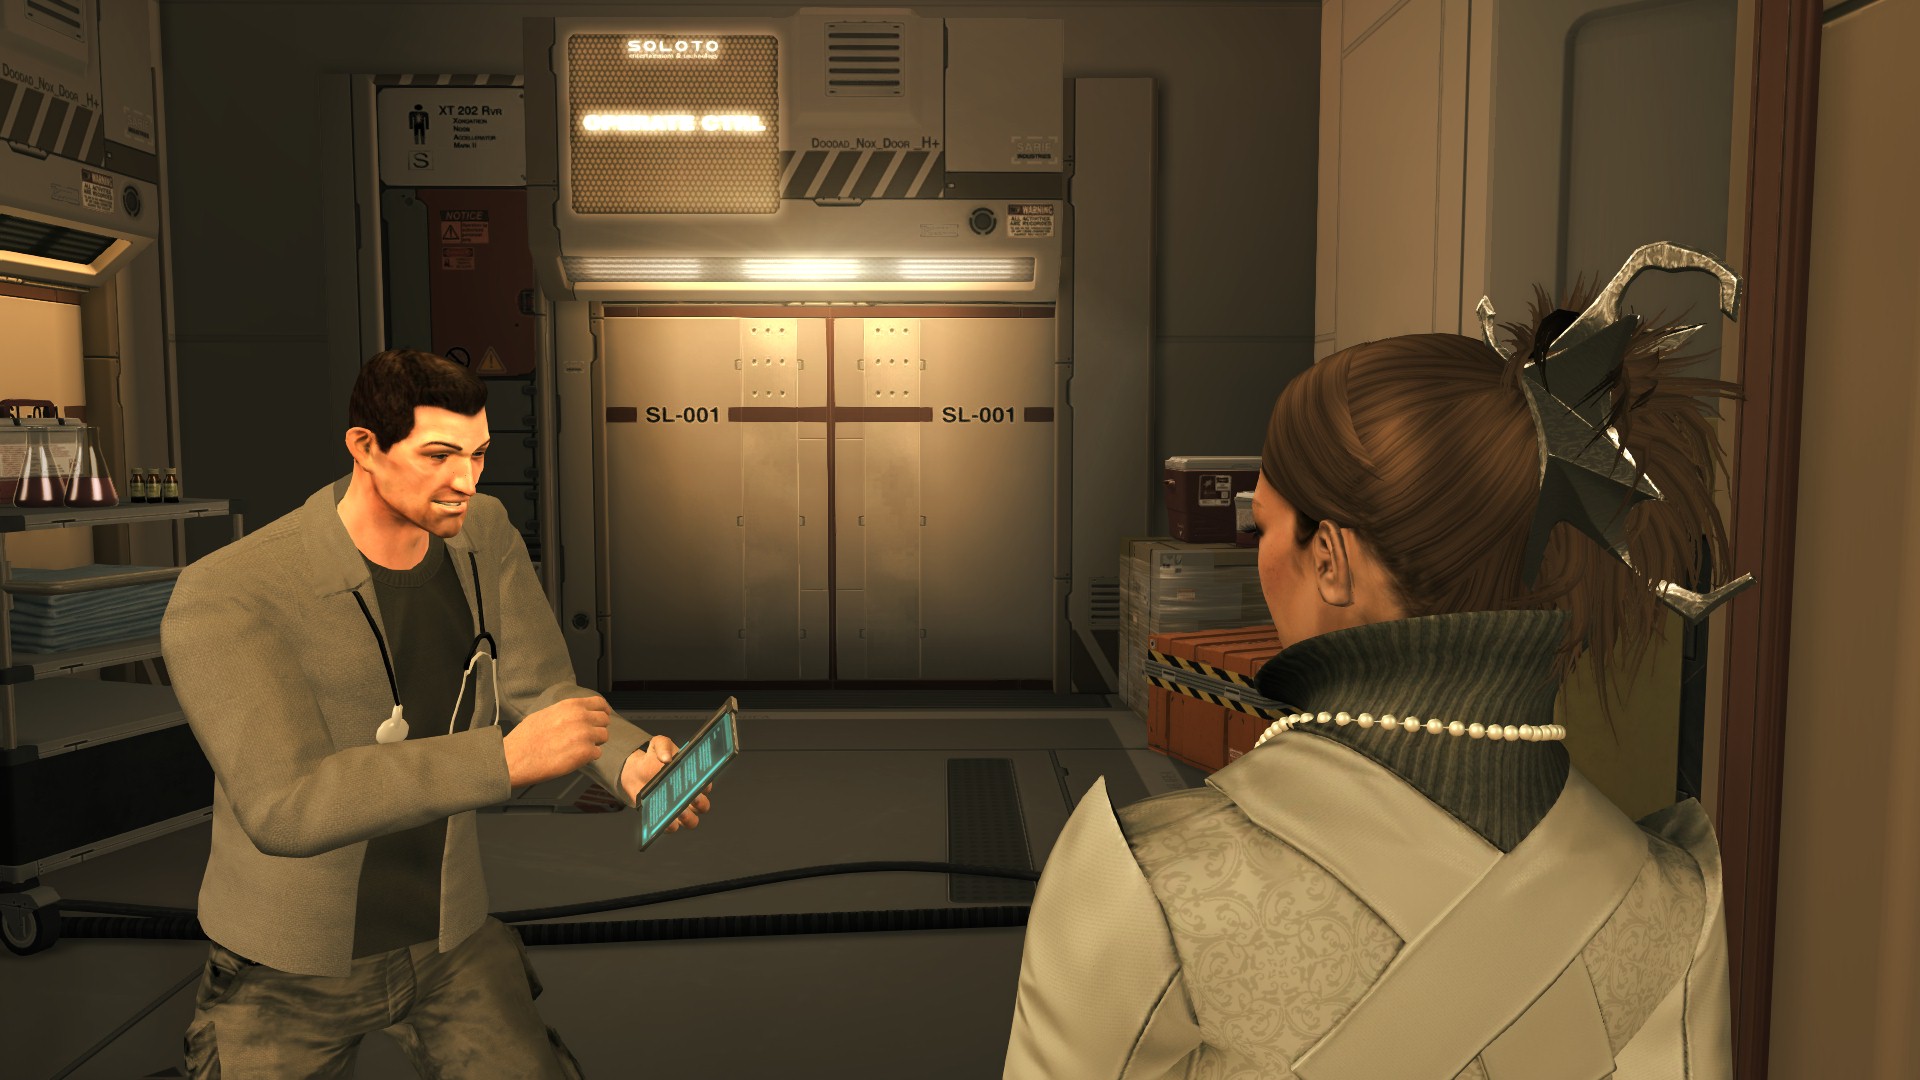
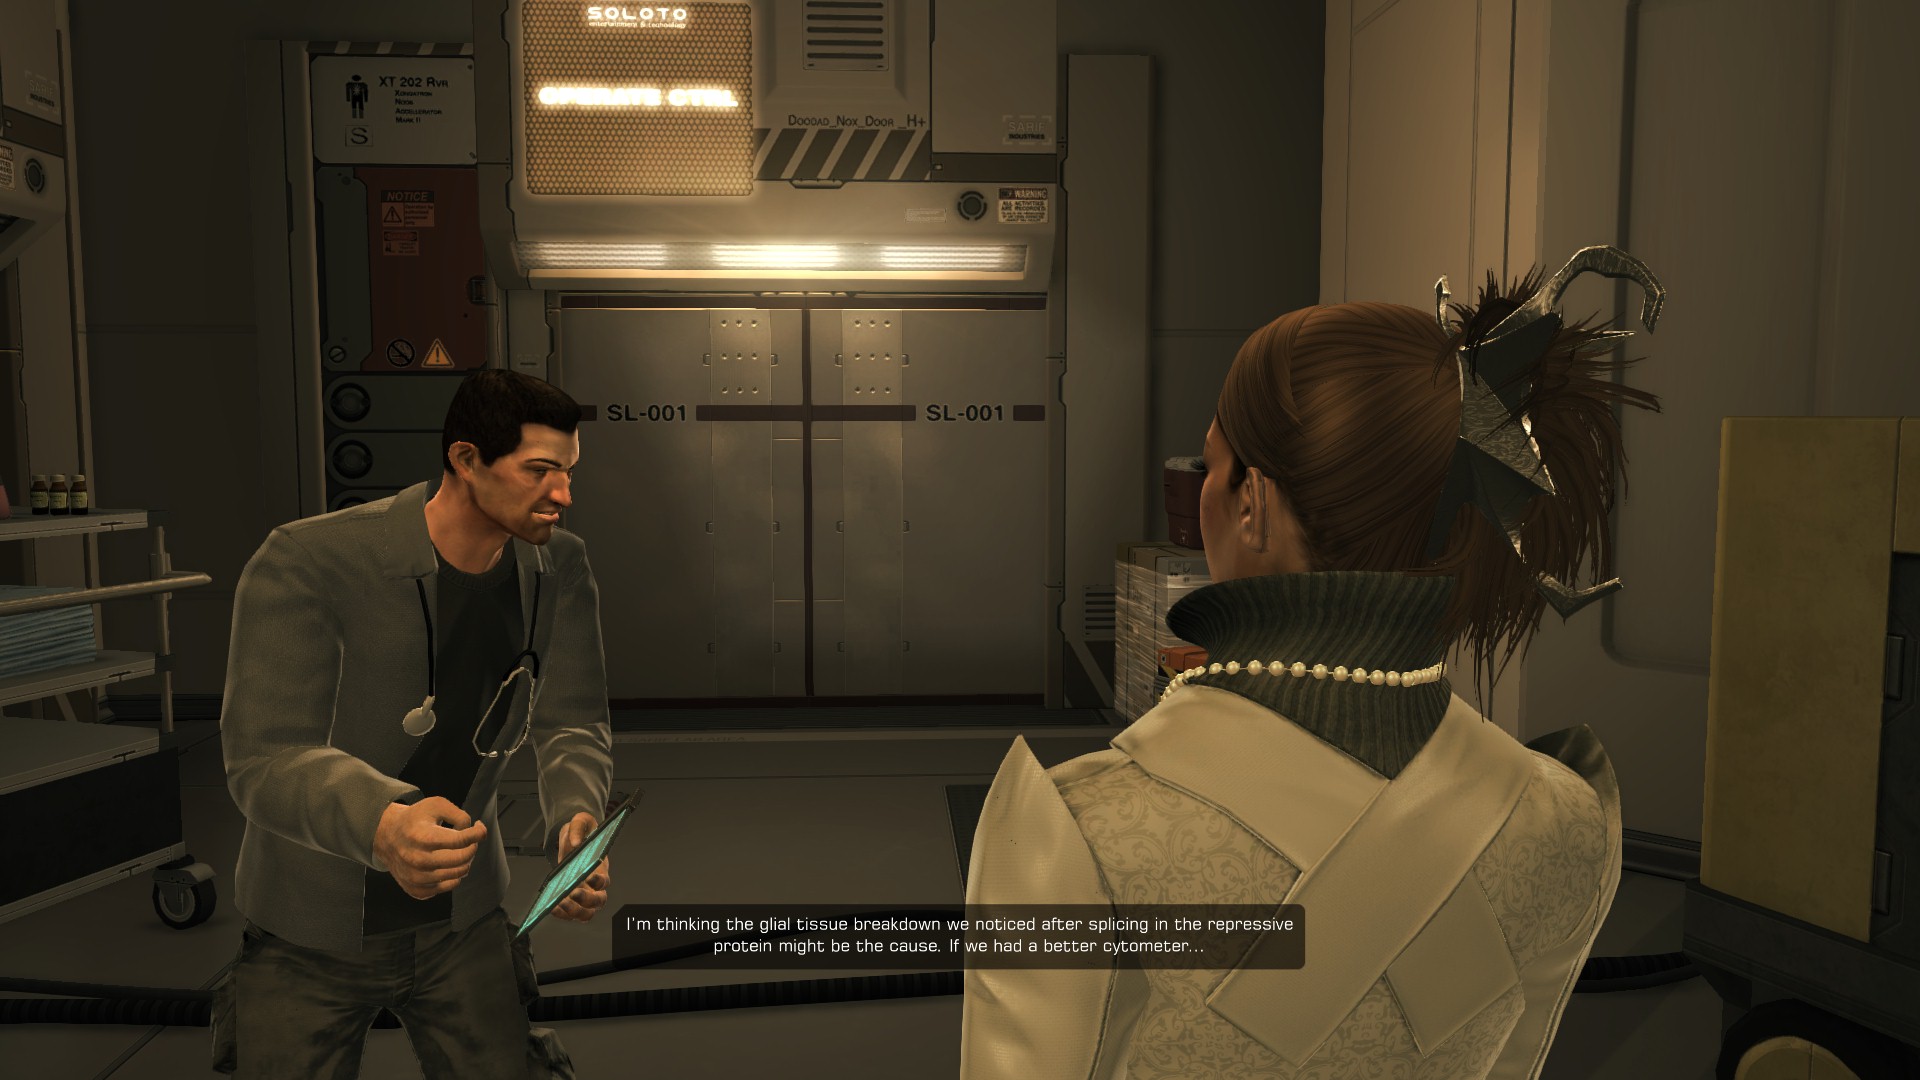
For example, take a look at this scene – comparing a stock Human Revolution vs. Director’s Cut with all my changes applied in (spoiler alert 😉). Even though post-processing and lighting have been re-implemented, something is still different. For example, Megan’s back is shadowed in the Director’s Cut, but it’s not in Human Revolution:

My first thought was that more lights are missing, but this is not the case as lightmaps of those two scenes are virtually identical. However, inspecting the relevant draw call reveals that in DC it also uses a shadow map – something Human Revolution does not use in this scene at all.
Initially, I thought that maybe this shadow map is a Director’s Cut addition, but this is not true. For whatever reason they are just not used in this scene, and therefore removing them from this particular scene would only result in a whack-a-mole situation, where I’d have to go through every scene in the game and see if they need any changes.
When investigating the differences I found several more unexplained changes like this, but they all boil down to the same problem – Director’s Cut was picking different shaders for the same geometry as if it had different material attributes assigned to them in the game engine. For example, I’ve seen cases of glass windows rendered without the use of a lightmap in Human Revolution, but using it in the Director’s Cut – and vice versa. As I mentioned, since I have no in-depth insight into the game’s engine, I decided to leave those untouched due to the possible risk of breaking everything.
I would love to hear what happened there because to me those changes seem somewhat random – if by any chance this post reaches anyone involved in the development of DXHR Director’s Cut, I’d love to hear the story behind that!
Part 2 – implementation
With all relevant changes documented and understood, it’s time to move away from a single test scene in Nsight and start implementing changes in the game!
For Deus Ex: Human Revolution Director’s Cut - Gold Filter Restoration, I chose a different route to what I usually do – I prefer making changes in the game code directly, utilizing in-engine features wherever possible. However, Deus Ex is far more complex than GTA or Scarface, so trying to understand how to use the engine seemed like pointless effort, and so instead I opted for a game-specific D3D11 wrapper.
With D3D11 and DXGI wrapped, I have full control over how the game is rendering, and therefore I can freely modify, add, or remove D3D calls. For bloom and lighting changes, the procedure was straightforward:
- Check for created pixel shaders. Once any shader we want to replace is encountered, create a corresponding alternate shader and mark the original shader for future reference.
- When the game wants to use a marked shader, check if it should be replaced with an alternate shader. If it should, provide D3D11 with an alternate shader instead.
- If the shader requires different inputs (for example, bloom intensity), apply them right before the draw call.
For gold filter, re-adding it was a bit more problematic because I needed a reliable point of reference to know when to draw the filter. The fact it is supposed to draw right after Anti-Aliasing makes it harder, since on PC the game has several AA modes to choose from, and it can also be completely disabled. Therefore, I opted for the following heuristics:
- Identify when the bloom merging draw is to be invoked. Bloom cannot be toggled on/off in option, so it is a reliable point of reference.
- Do nothing until the first UI element is about to be drawn.
- Once that happens, save the D3D11 state and draw the gold filter. Then, restore the D3D11 state.
It might sound sketchy, sure – but it’s been extensively tested and it turned out to be surprisingly reliable!
With everything set in place, the game works and looks beautiful. Comparing side-by-side, it shows how impactful the design changes between Human Revolution and Director’s Cut are:
Comparing only the lighting changes, the difference can be relatively big too:
Polishing up the user experience with Dear ImGui
Switching visual styles during the game is a nice addition, but relying on function keys or the INI files alone can be counter-intuitive. Since the modification has several toggleable options, I decided to go ahead and integrate Dear ImGui, an industry-standard UI for in-game configuration menus. Integration was easy and resulted in a tidy, minimalistic UI:
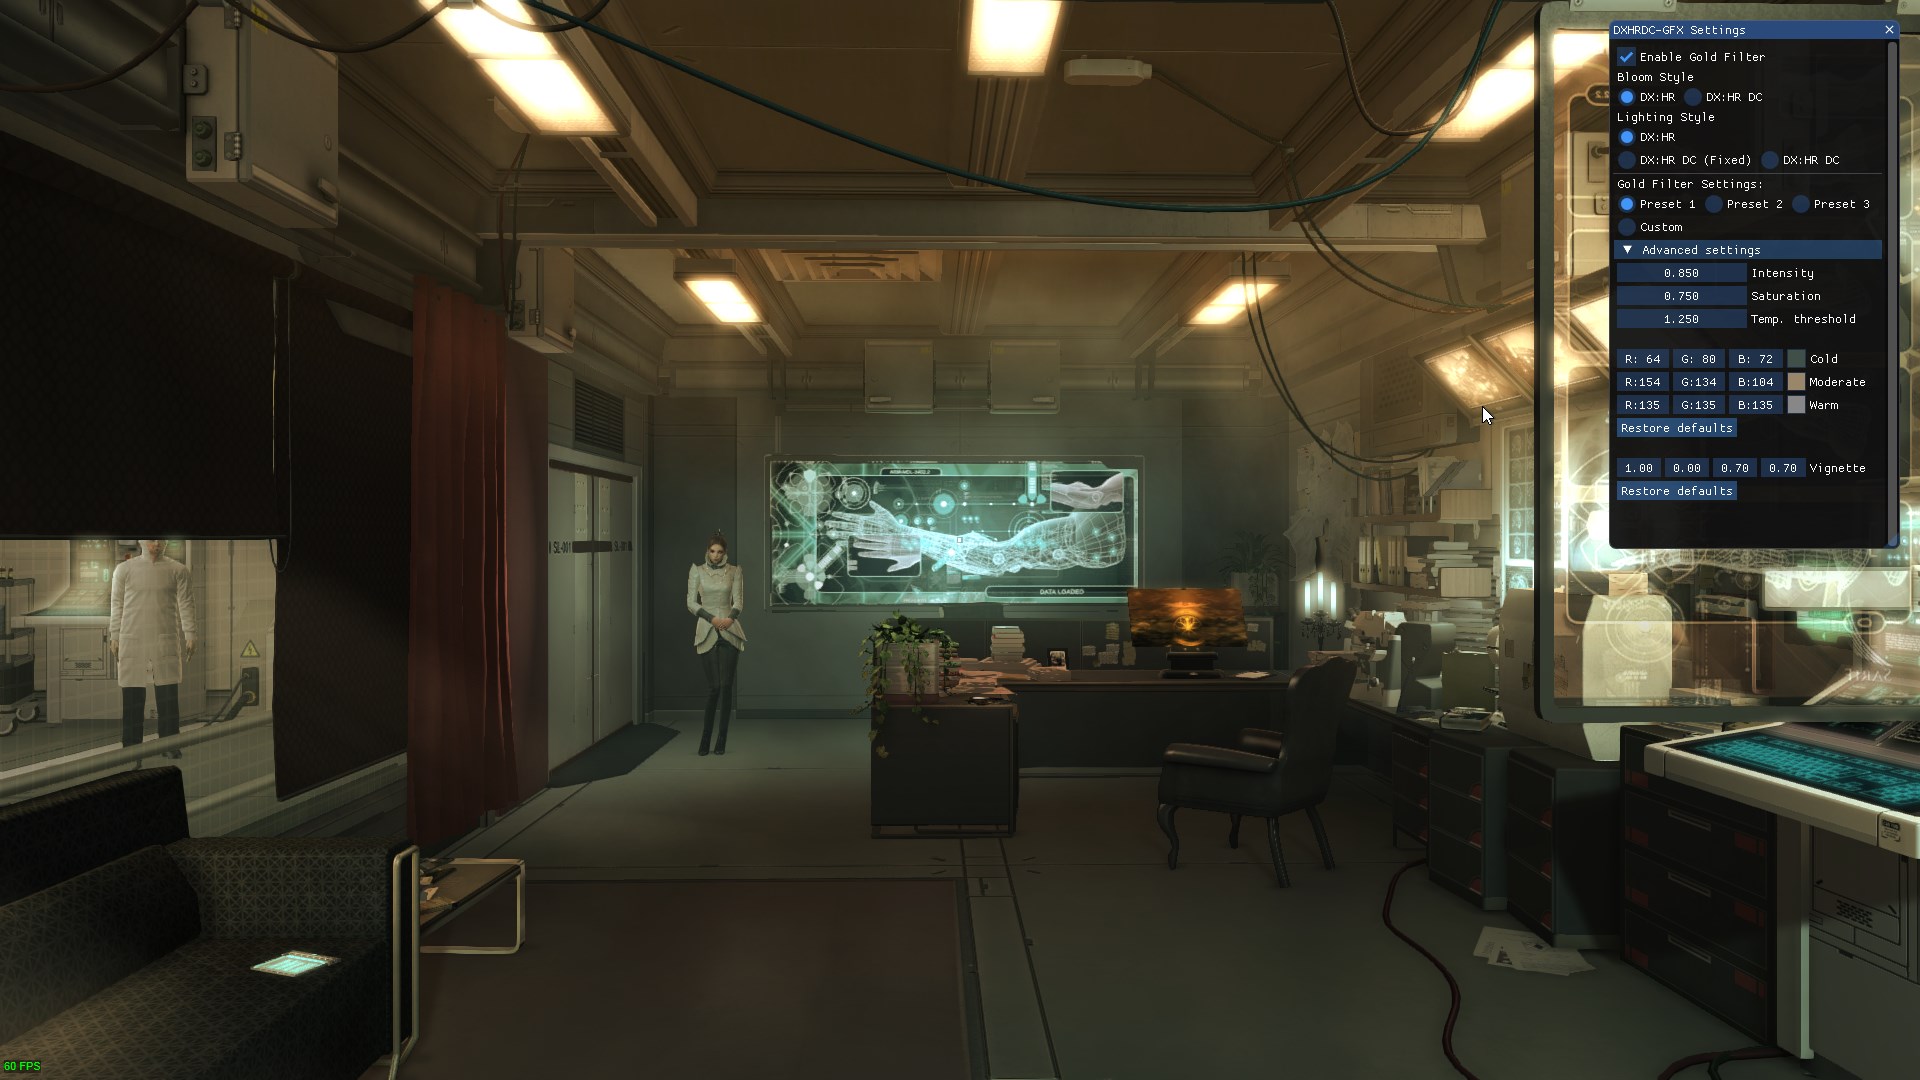
The UI allows to toggle every effect separately, as well as opt for “fixed DC lighting” – which does not make lights brighter, only fixes the ones which were broken.
Color grading presets match the 3 sets of colors presented earlier in the article – but it is also possible to create custom settings via Advanced settings. Color grading is fairly versatile, so it is possible to create a plethora of different effects – grayscale, sepia, thermal vision, etc. Feel free to experiment!
Download
Without further ado, the modification can be downloaded from Mods & Patches. Click here to head to the game’s page directly: Download DXHRDC-GFX
After downloading, all you need to do is to extract the archive to the game’s directory and that’s it! The in-game configuration menu is accessed by pressing F11.
What’s next? (maybe)
This modification is obviously not a SilentPatch (although fixed lighting is as close as it gets to an actual “fix”), but it does not mean the game is free of issues. The most interesting problem I was made aware of are issues with a laggy camera:
Turns out, this issue is related to high PC uptime, so rebooting the PC fixes it! I debugged similar issues in the past, so I will likely look into those in the future too. SilentPatch for Deus Ex: Human Revolution and Director’s Cut is not unlikely to happen!
For those interested, the full source code of the mod has been published on GitHub, so it can be freely used as a reference: See source on GitHub
-
Both DXHR and Director’s Cut also offer D3D9, but as far as I know not many people use it. I decided to ignore it completely for now. ↩