First of all, I really liked Yakuza 0. Its PC port, released in August 2018, was my entry to the series. I knew absolutely nothing about the franchise before that (other than the fact it exists), so I had no idea what to expect. But oh boy, I had a blast! No game last year engaged me as much as Y0 did, I absolutely loved it. Not only the game was good – proper PC port also helped with the experience, by featuring anything you’d expect from a PC version of the game – that is uncapped frame rates, good peripherals support etc.
No game is flawless though – if Yakuza 0 was, this article wouldn’t exist in the first place. What went wrong?
The port has been overall well received, however there is something which was bugging people about this release – lighting appeared to be severely downgraded in several scenes. This view perhaps shows it the best:
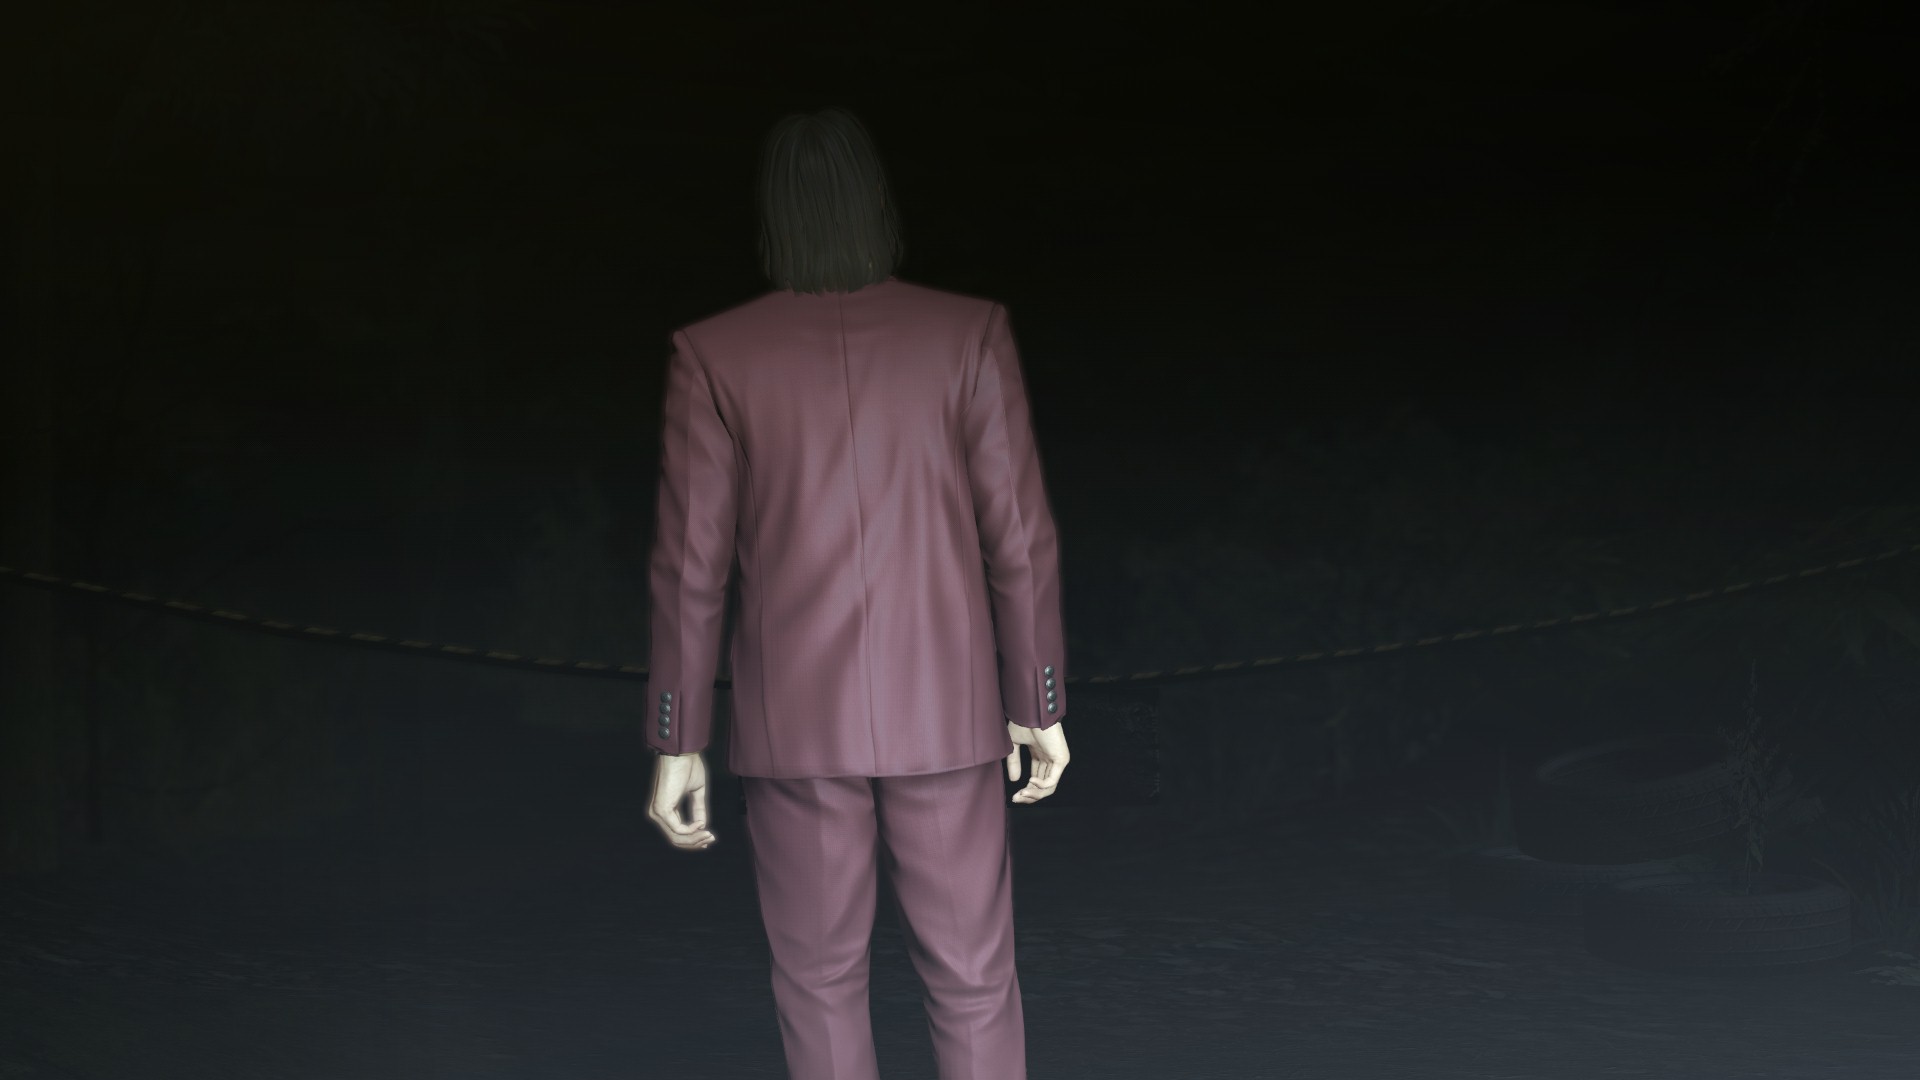
Surely it’s not meant to be pitch black like this, right? Character seems to be lit properly (you can clearly see light reflecting on the suit!), but the environment – not so much. It’s even more evident in another shot, where car headlights cast no light at all:
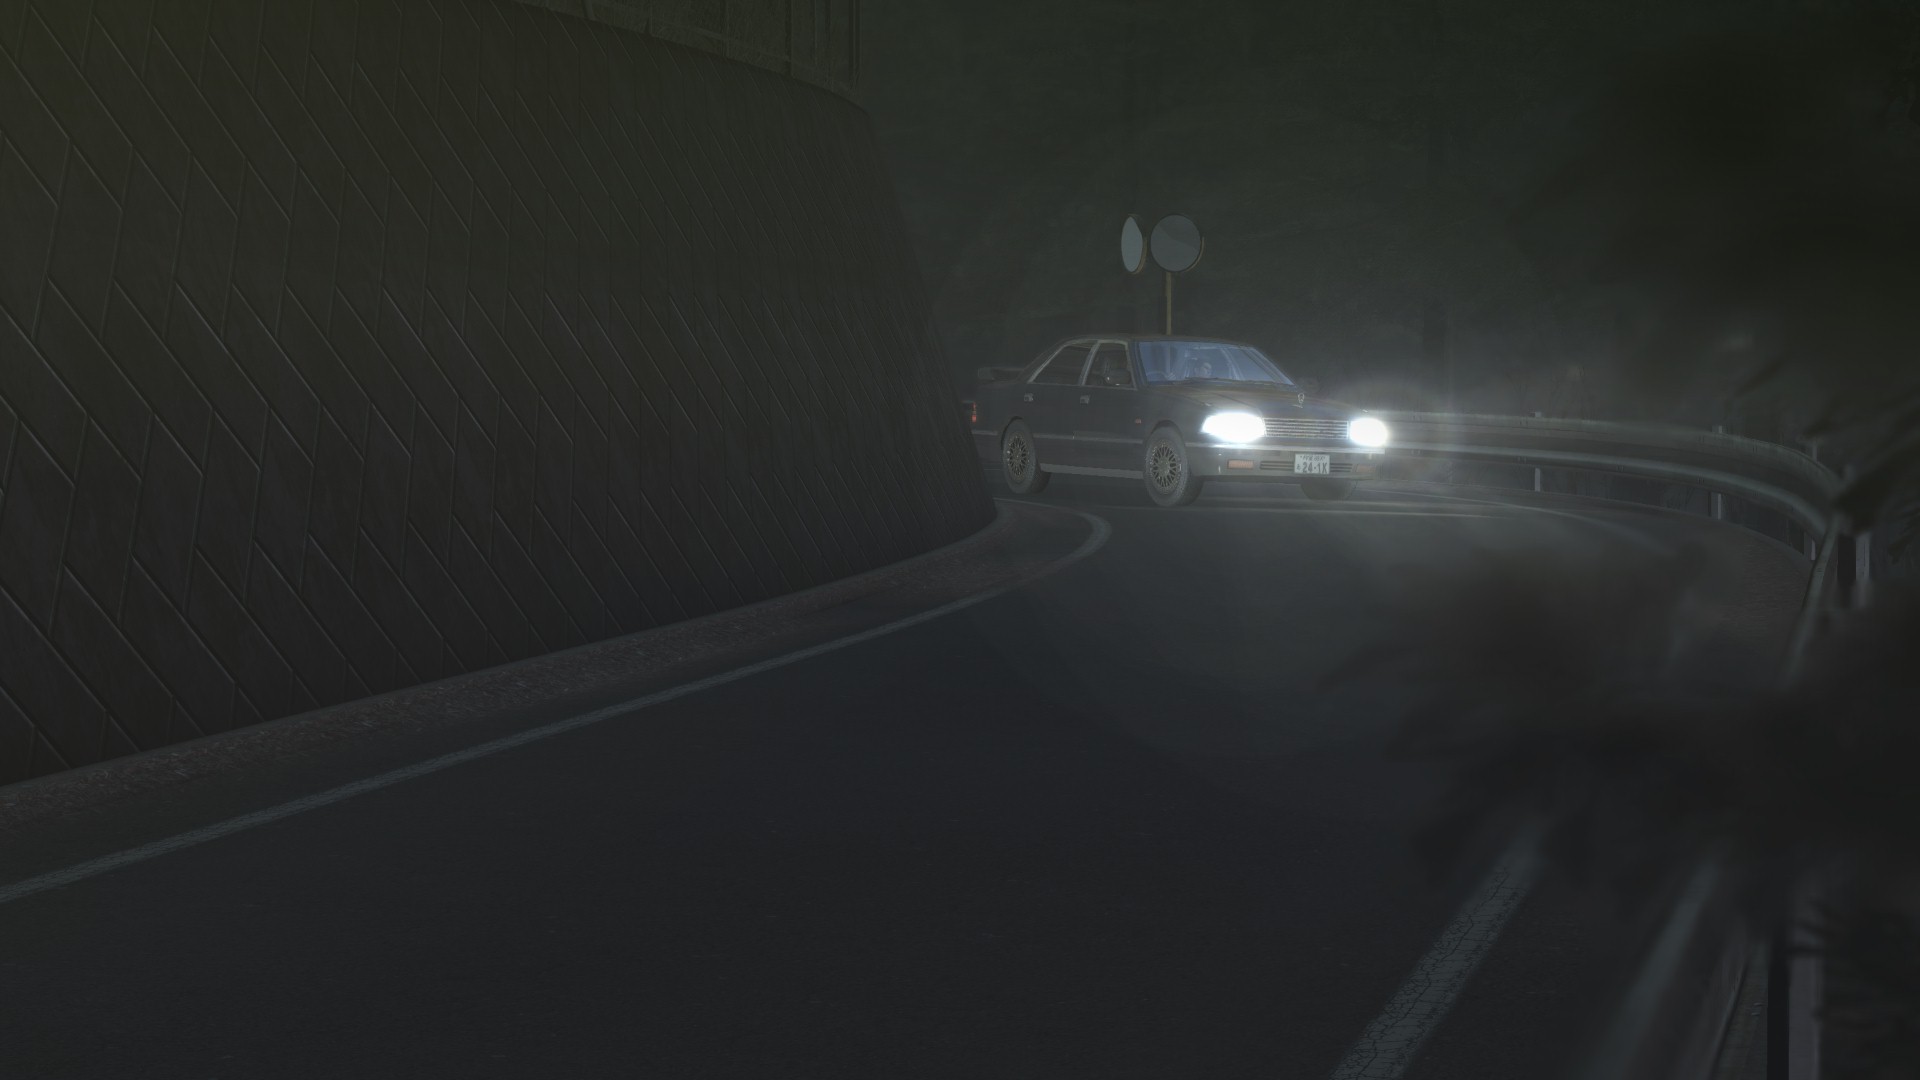
Finding the issue
Since it’s a D3D11 game, I can try to get to the bottom of it using a graphics programmer’s best friend – RenderDoc.
Game rendering consists of several separate render passes – shadows, normals, colour and post processing are performed in separate render passes. How to find what’s wrong easily? Usually you expect a render pass to have valid inputs and outputs – if it didn’t produce anything, it wouldn’t make sense to have it in the first place. Thankfully, I could quickly fine a pass which violated that rule of thumb – a pass consisting of a single full screen draw, outputting nothing!
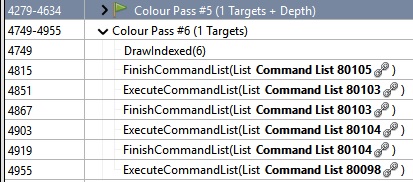
Looking at both inputs and outputs of this pass, we can immediately tell something is not quite right…
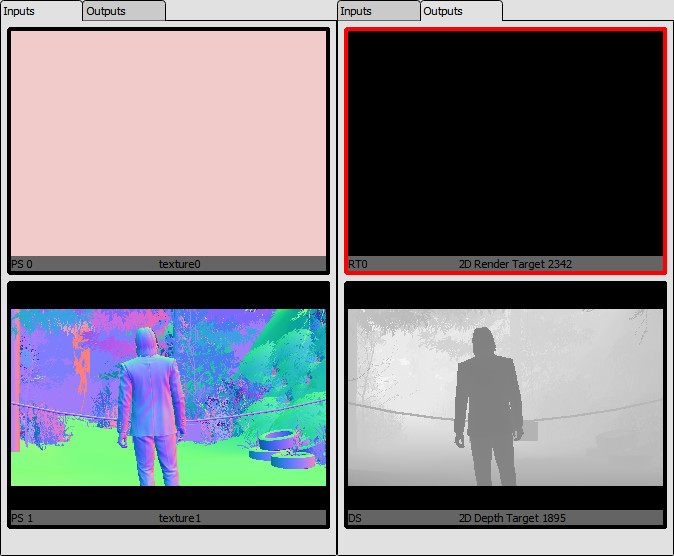
There are two issues here – one of the input buffers is not bound (ie. not specified; RenderDoc shows it in pink-ish colour), and output is completely blank! That can’t be right. How can I identify that this is the buffer I am looking for?
Let’s see where it’s used:
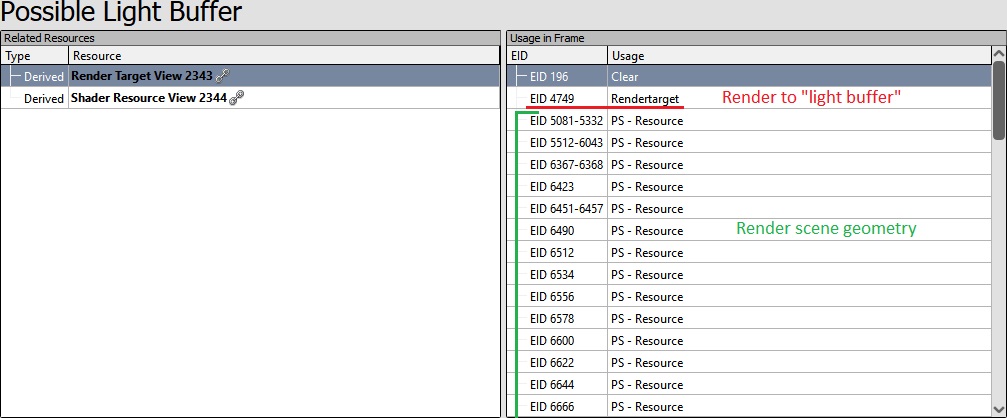
It seems very plausible – the buffer is cleared to black, then (possibly incorrectly) rendered to, then it’s used as one of the input buffers for scene rendering. The only fully black buffer to be used so, I might add.
I wonder, could I simulate how would things look if this buffer was fully white instead of fully black….?
Modifying the capture – take #1
Yes, I can! RenderDoc comes with a solution – we can export captures to an XML file, modify them and reanalyze them! This way I can poke the capture with numerous “what if…” scenarios without having to hook into the game.
Flow in this case is fairly straightforward:
- Export the capture to XML.
- Find the
Clearcall which we found earlier. -
Modify its parameters so it clears the buffer to white and not black.
<chunk id="1085" name="ID3D11DeviceContext::ClearRenderTargetView" length="48" threadID="3300" timestamp="125076025" duration="0"> <ResourceId name="Context" typename="ID3D11DeviceContext *" width="8" string="ResourceId::36">36</ResourceId> <ResourceId name="pRenderTargetView" typename="ID3D11RenderTargetView *" width="8" string="ResourceId::2343">2343</ResourceId> <array name="ColorRGBA"> <float typename="float" width="4">0</float> <!--Change this to 1 --> <float typename="float" width="4">0</float> <!--Change this to 1 --> <float typename="float" width="4">0</float> <!--Change this to 1 --> <float typename="float" width="4">0</float> </array> </chunk> - After modifying the call, save and reimport the capture to RenderDoc.
- Check how the scene looks now….
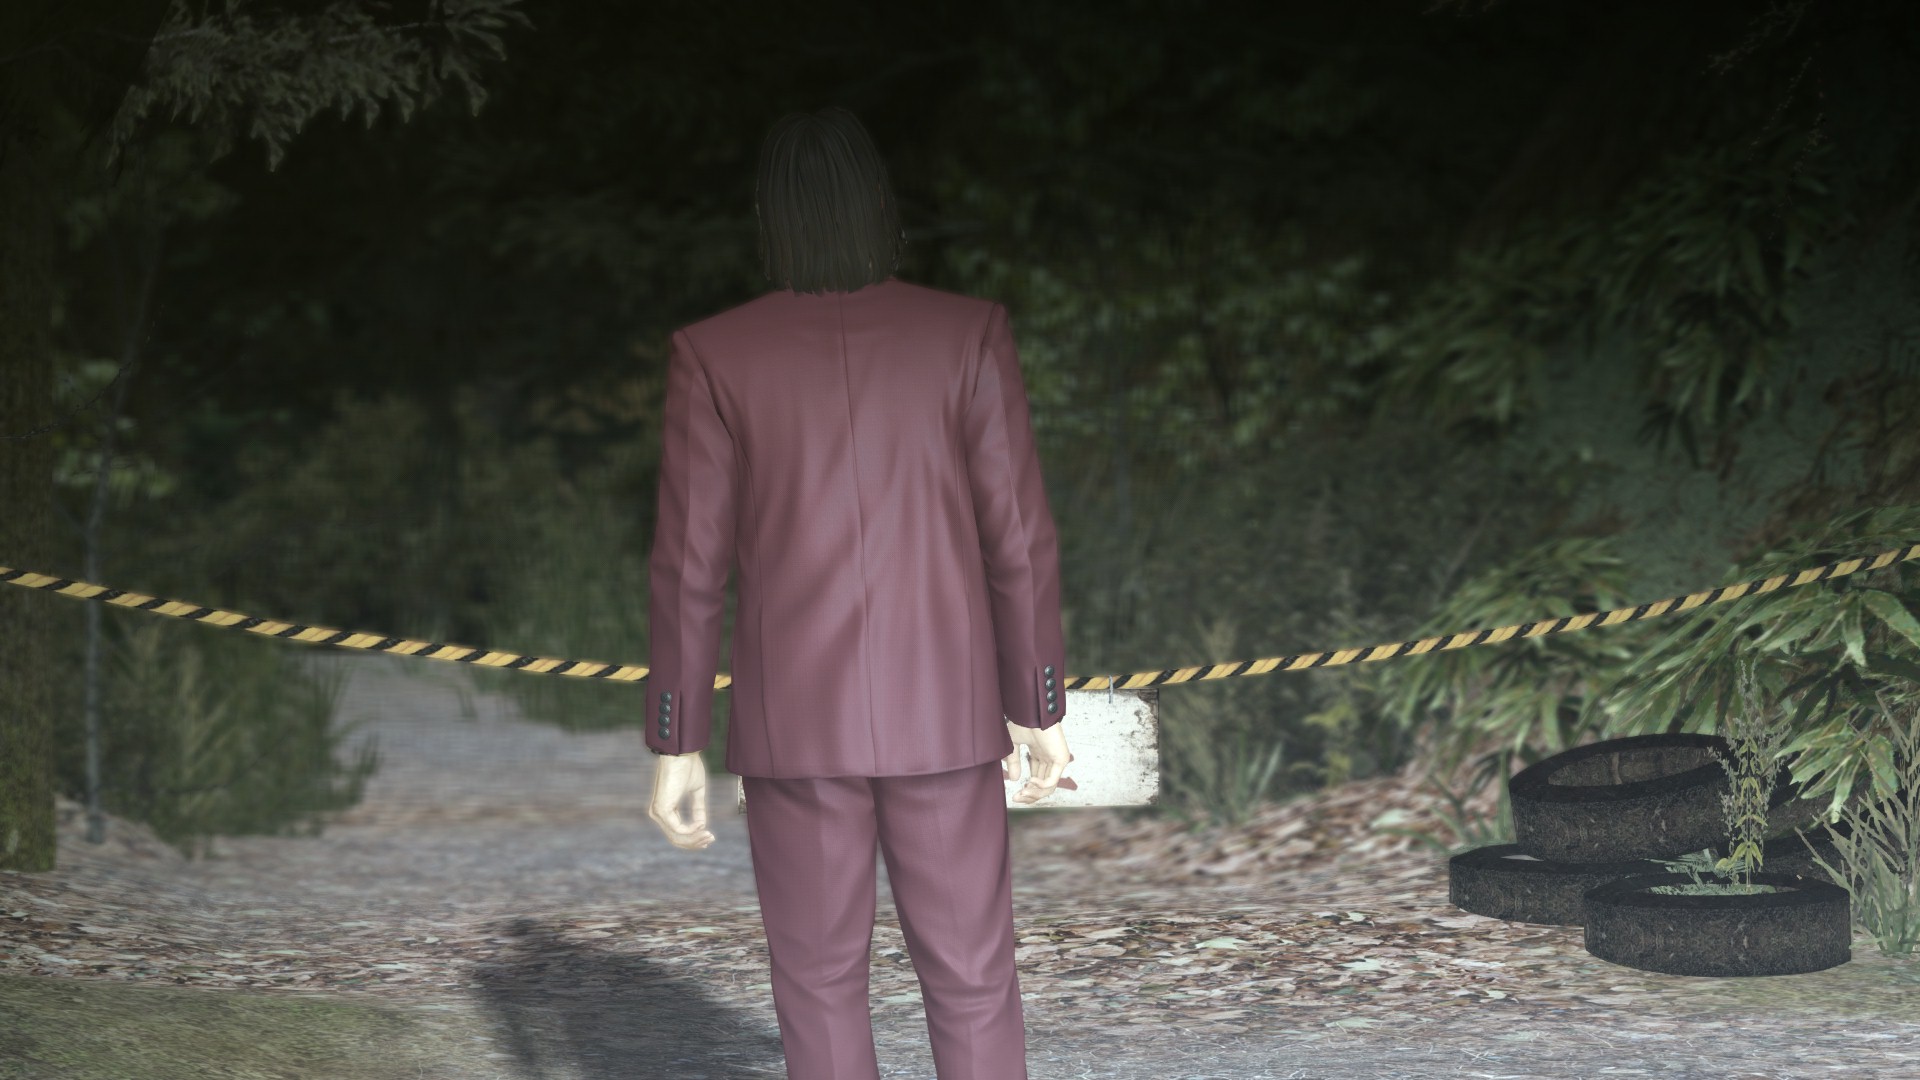
…and it works! Verdict:

Clearly, there is a long way between this state and having it actually fixed, but now I at least know that lighting will be applied correctly when the render pass gets fixed.
Figuring out the issue
Before we try to understand why things are broken, it’s worth looking at another shot from the same scene. Despite a popular belief, lighting is not completely gone from the game! There is at least one shot where it seems to work more or less correctly:
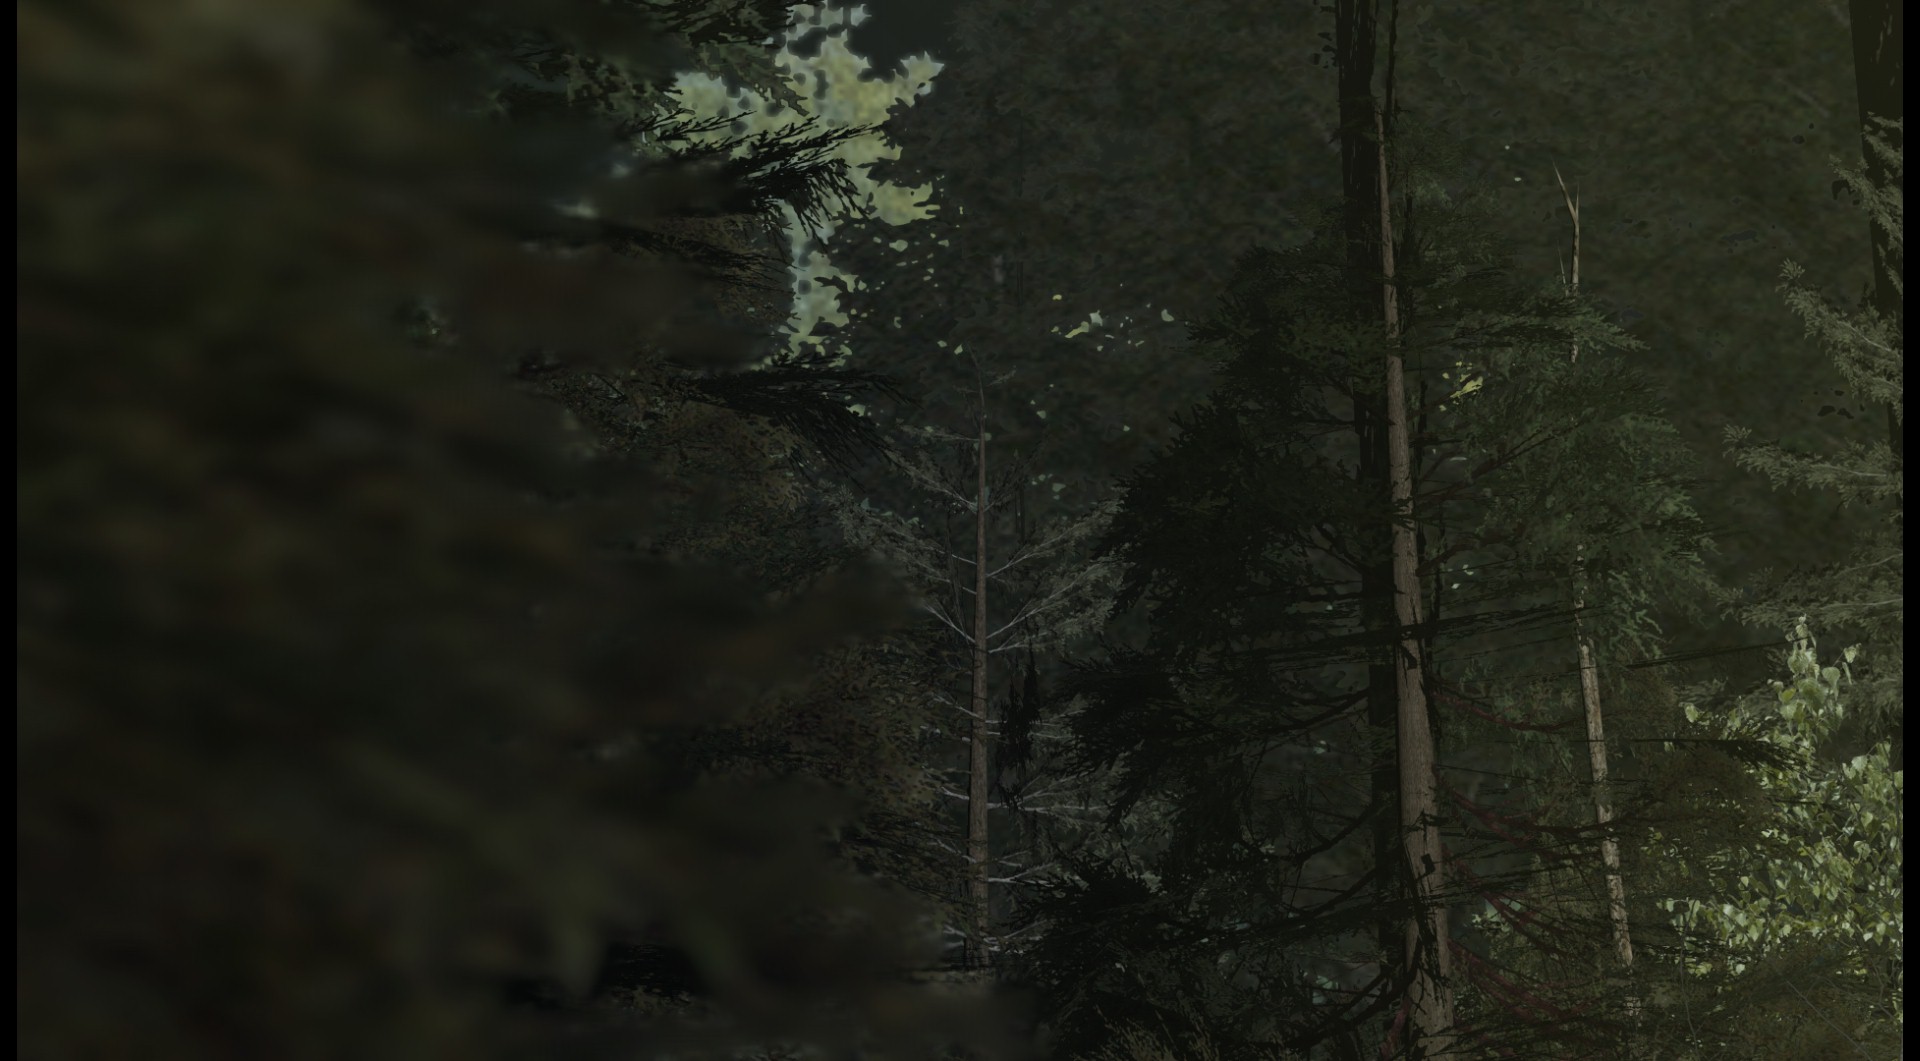
And that’s how that “possible light buffer” looks at this moment:
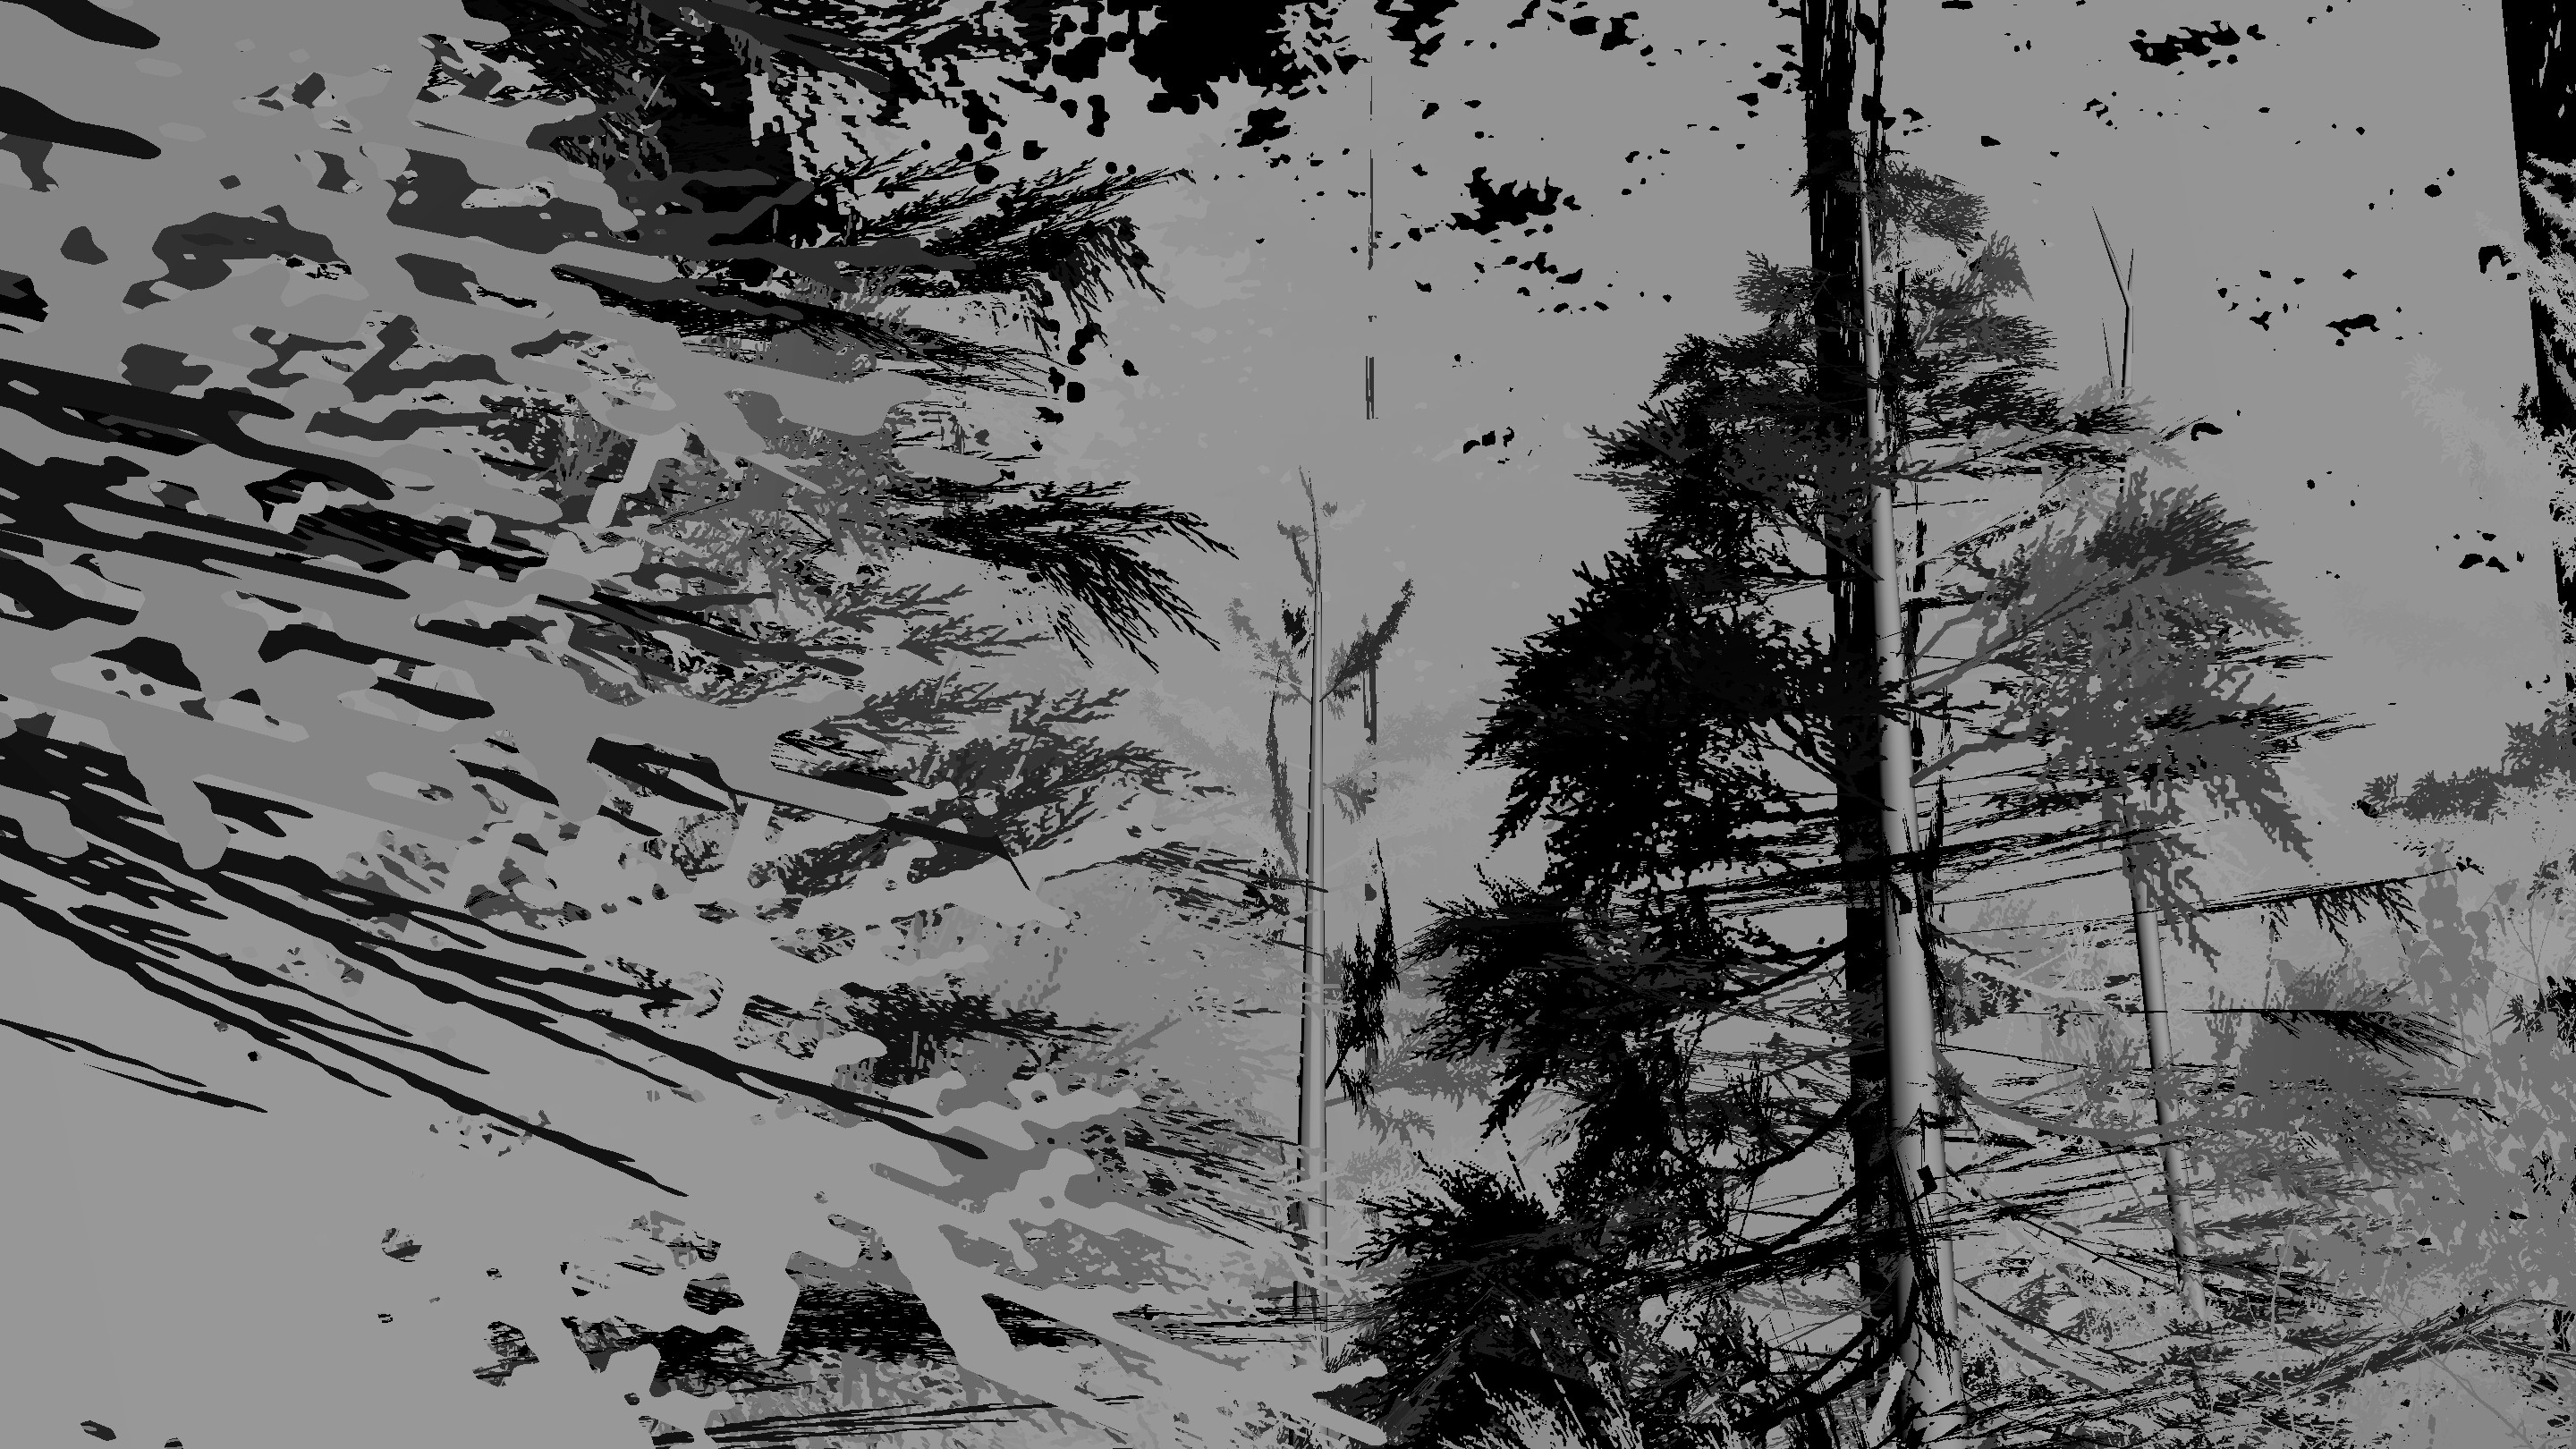
It looks somewhat correct, so this render pass is not completely broken at least… At this point, there are two possibilities of what causes the issue:
- Wrong constant buffer contents
- Unbound input buffer
So as not to keep the analysis needlessly lengthy1 by diving into too much detail – initially I chose the wrong answer. that is I started looking into the constant buffer. My reasoning was that “it works in some cases, so clearly this unbound buffer does not matter! Otherwise it would probably never work”, and that actually turned out to be a red herring. Modifying constant buffers indeed allowed to artificially reintroduce lighting into otherwise broken scenes, but a permanent fix turned out to be impossible.
Thankfully, Lab42, the studio behind this port, came over and (kind of) saved me from diving too deep into this2.
Official patch
Shortly after I first posted about this research on Twitter, this issue has been fixed in an official patch:
A new Yakuza 0 patch is available on the community test branch!
— Lab42 Games (@Lab42Games) 11 February 2019
Includes:
Shadow/lighting fixes
Particle effect fixes
Improved ultrawide support
FOV slider
+ Much more
Full patch notes and instructions are available here:https://t.co/WhuWRRM0GZ
Relief? Of course – for numerous reasons. People complained about the issue quite a lot, at that point I didn’t know if it’s fixable via an unofficial fix, plus even if I fixed it most people would still prefer an official fix. As far as I’m concerned, having this fixed officially was a win-win.
However, now that I had both wrong and fixed cases available easily, I could compare and find out exactly how far I was from fixing it! At this point, it retained a purely educational value.
Let’s start by taking a look at the very same shot with the patch:
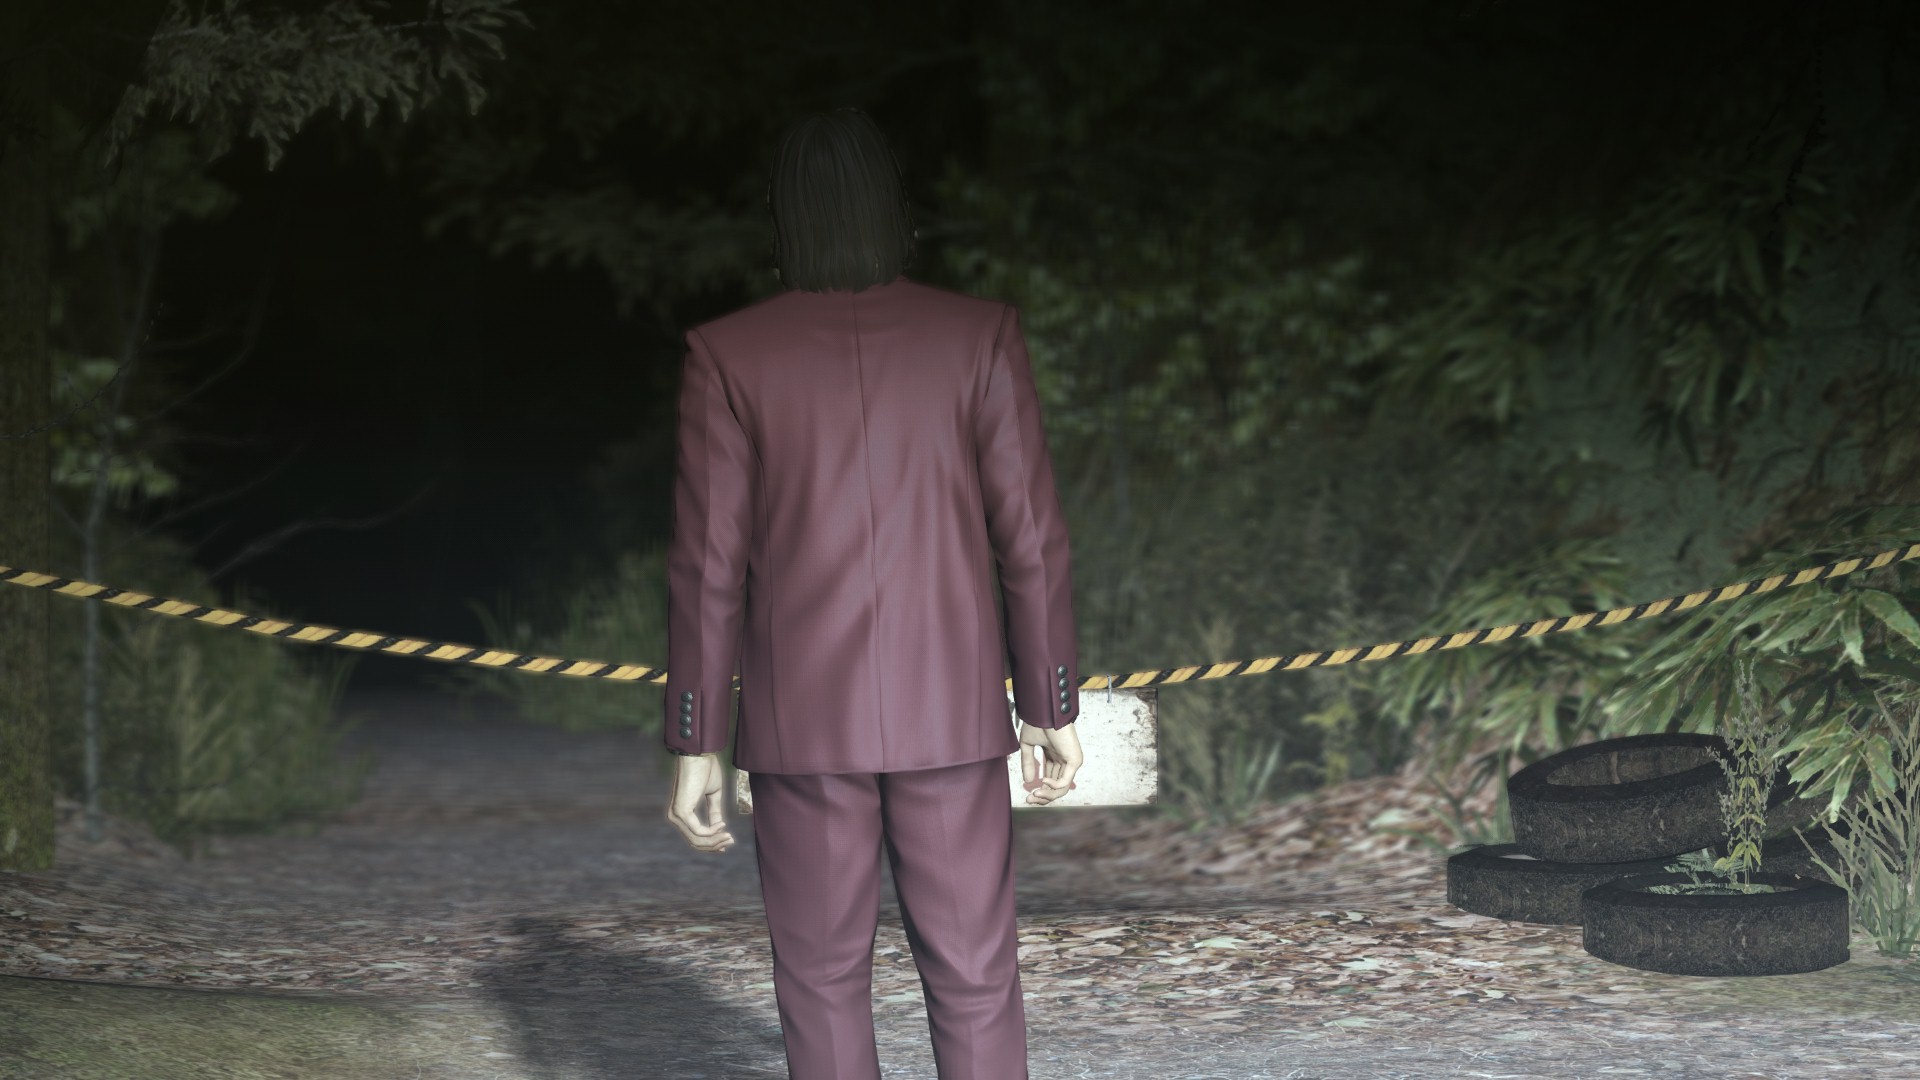
Looking much better, right? Let’s take a look at the light buffer:
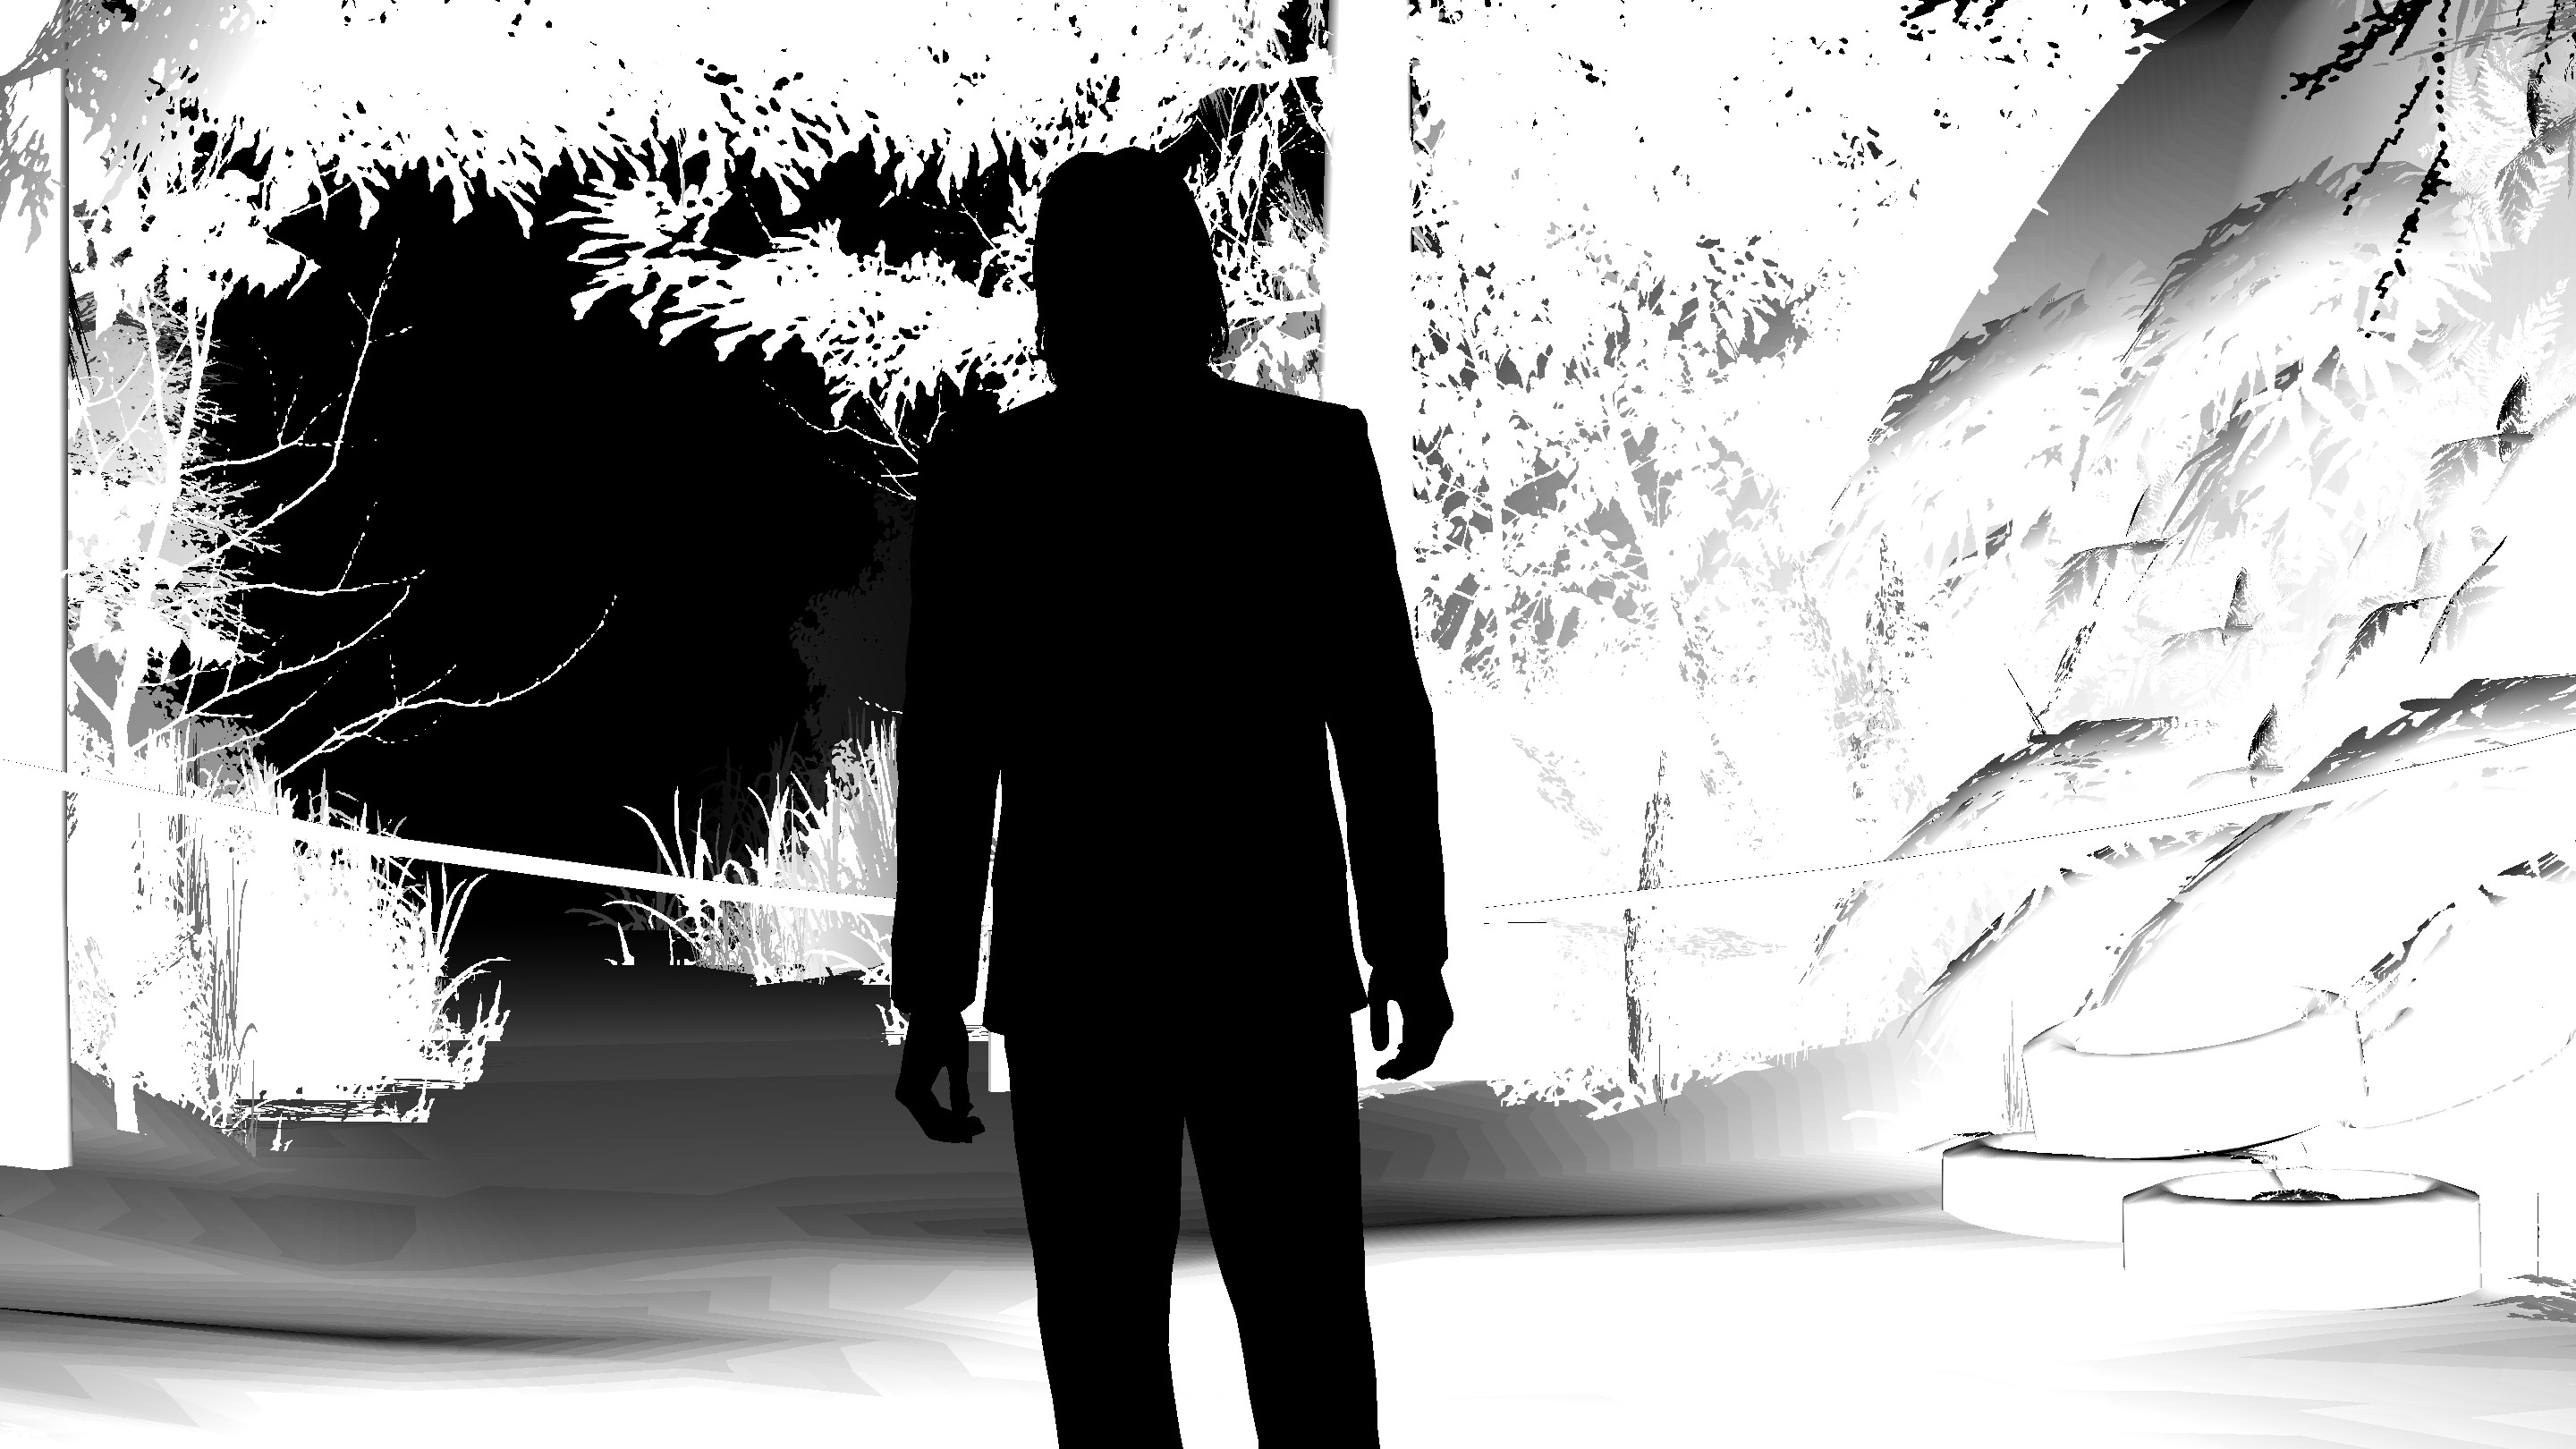
This makes much more sense than what was there before the patch.
Now, inputs and outputs for the very same draw provide an answer on what was fixed – compare this with an earlier screenshot:
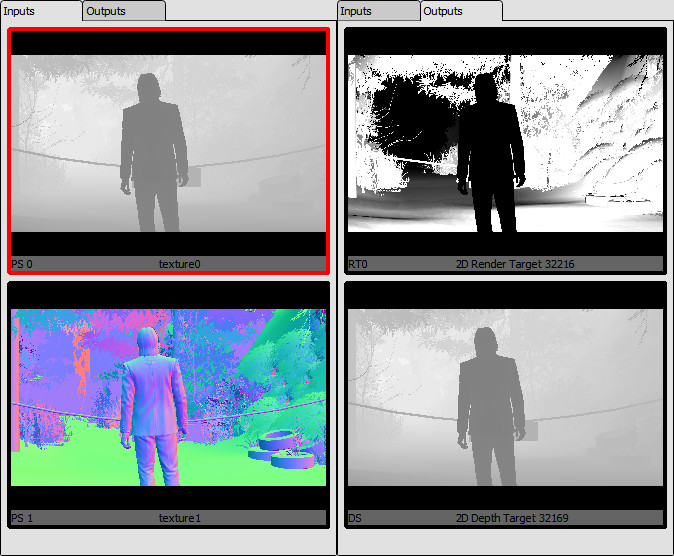
So it was an unbound buffer! Patch3 bound it correctly, and thus the light buffer is rendered correctly. This is not enough though – it would still be good to know exactly why the issue surfaced in the first place!
Modifying the capture – take #2
My first theory was that the buffer was never bound. This quickly turned out to be untrue, as buffer binding calls are identical between the unpatched and patched versions – here I named several resources to make it easier to understand:

Moreover – notice that the EID (Event ID) are identical in both cases! This means that no calls have been added or removed with the patch3. Therefore, WTF? It appears like the buffer has been correctly bound even before the patch, yet RenderDoc shows it as unbound, and the game doesn’t treat it as bound either.
While this looks like a lost cause, it actually turned out to be something more common than I would expect. Baldur Karlsson, author of RenderDoc, notes:
If you want to bind the same texture as DSV and SRV then you need to make sure it’s set appropriately read-only in the DSV. If there’s ever a read/write hazard D3D11 prioritises the writable binding. So if it’s bound for read, and you bind write, the read gets unbound. If it’s bound for write, and you bind read, then it binds NULL.
Remember how both input and output point to the same depth buffer? With that in mind, it sounds very plausible!
Let’s take a look at the depth buffer itself and the views it has (this is same for both unpatched and patched version). Once again, I named them for convenience, so as we don’t need to dive into D3D11 flags to understand the meaning:

Multiple views! This starts to look very much like what Baldur described – a read/write hazard. Thus, the next thing we need to do is find the D3D11 call binding output buffers for that draw, and compare its context. Here’s how it looks before the patch:

Writable view – plot thickens! Binding as an input buffer is a read-only bind, but here we see an attempt to bind the buffer as output for writing. Therefore, even though an input buffer was bound in advance, it’s now unbound.
Was this the problem all along? Capture from a patched version provides an answer:

Yes! Looks like that was the issue, much more straightforward than one would expect. However, it also possibly explains why it remained unfixed for such a long time – this type of behaviour may or may not be very platform specific, so it is very possible that on PS4 input buffers are not being unbound like they are in D3D11. This may very well be an original bug which never showed up on original platforms (that is, PS3 and PS4).
However, since at this point it’s pure science, let’s try to prove for sure that this is the fix… by fixing it manually in RenderDoc!
Fixing the capture
The fix turns out to be pretty easy – locate this draw, find the call binding buffers, make it bind a read only view instead of writable one. Since we know resource IDs of both views, this becomes trivial:
<chunk id="1065" name="ID3D11DeviceContext::OMSetRenderTargets" length="36" threadID="10748" timestamp="125080756" duration="1">
    <ResourceId name="Context" typename="ID3D11DeviceContext *" width="8" string="ResourceId::2540">2540</ResourceId>
    <uint name="NumViews" typename="uint32_t" width="4">1</uint>
    <array name="ppRenderTargetViews">
        <ResourceId typename="ID3D11RenderTargetView *" width="8" string="ResourceId::2343">2343</ResourceId>
    </array>
    <ResourceId name="pDepthStencilView" typename="ID3D11DepthStencilView *" width="8" string="ResourceId::1896">1896</ResourceId> <!--Change both 1896 to 1898 -->
</chunk>
Next, reimport a modified capture and… it works! We now have two exactly identical frames with and without the fix, so we can compare side by side, and watch lighting unfold on the screenshot:

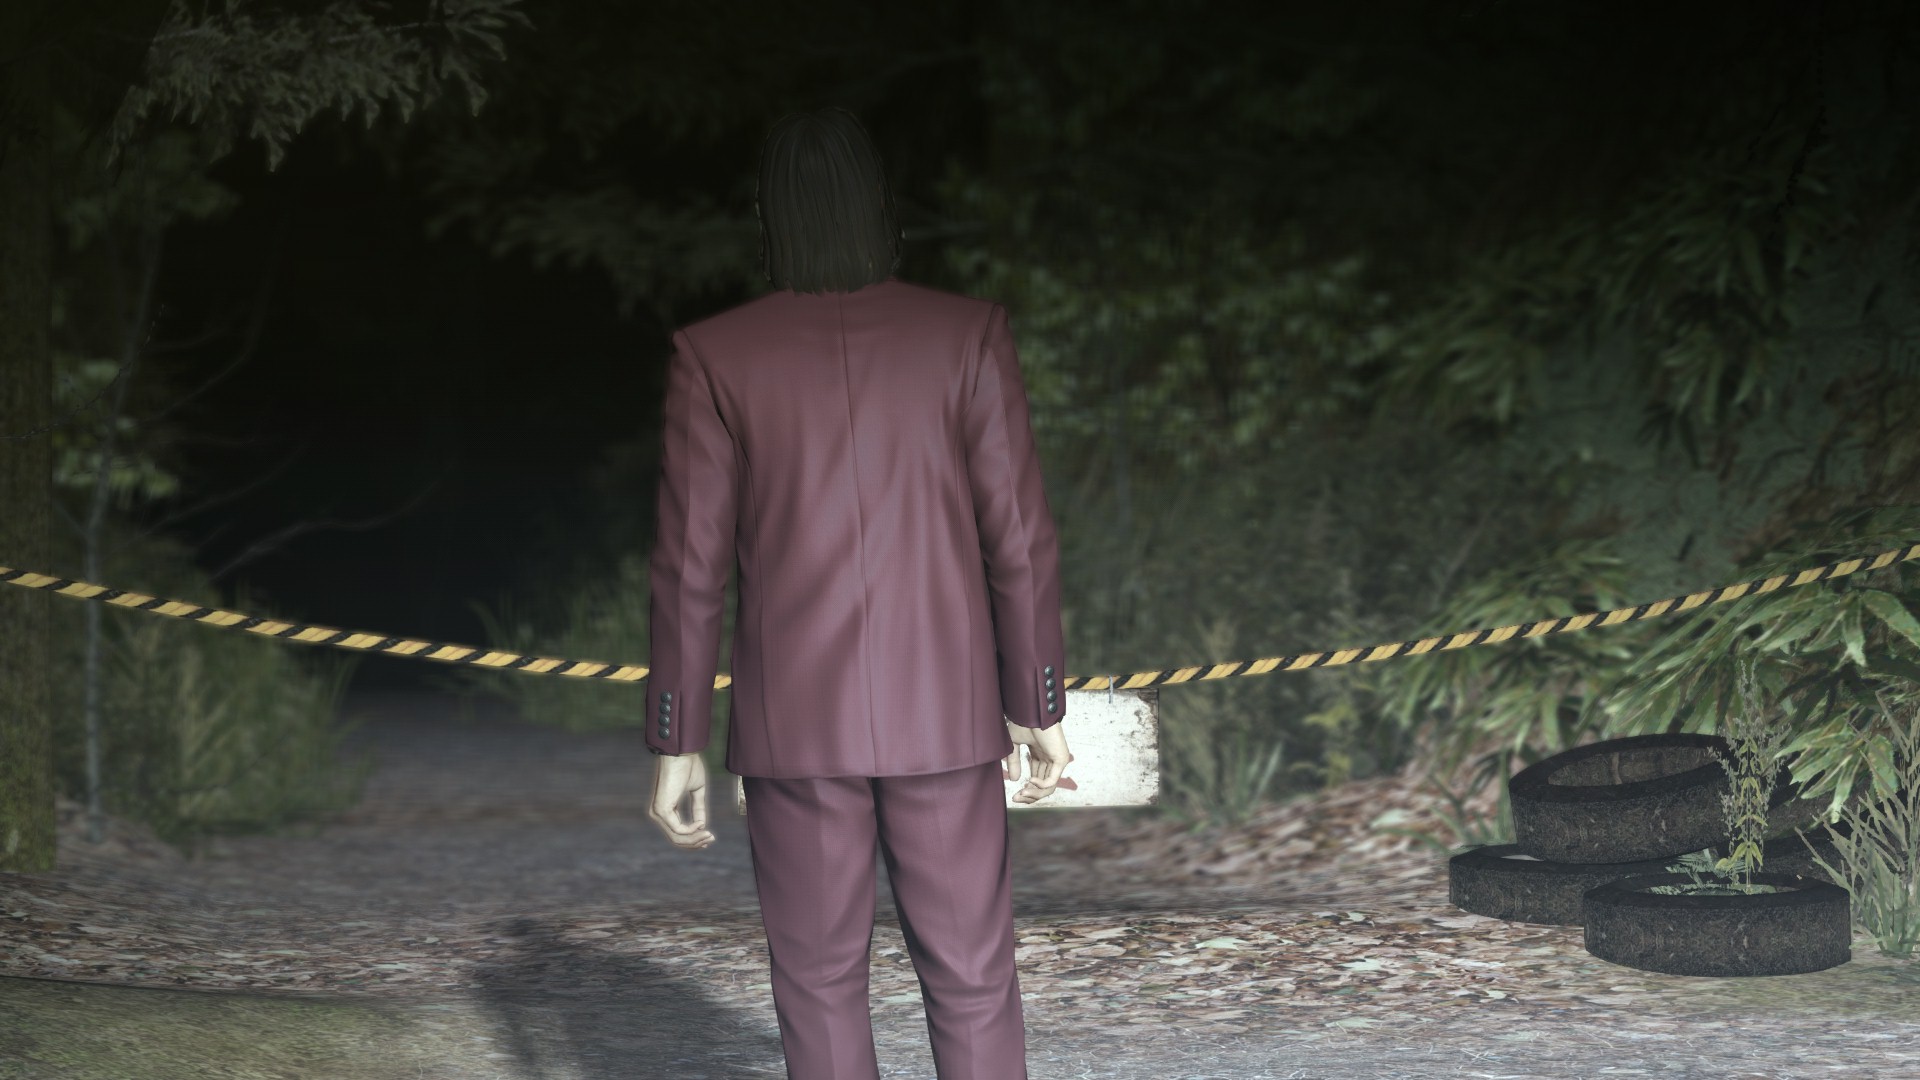
At this point it’s been satisfactory enough. The issue was fixed, knowledge was gained – success!
Next stop – Yakuza Kiwami! Really looking forward to playing this game very soon. Who knows, maybe it will also have issues worth looking into?